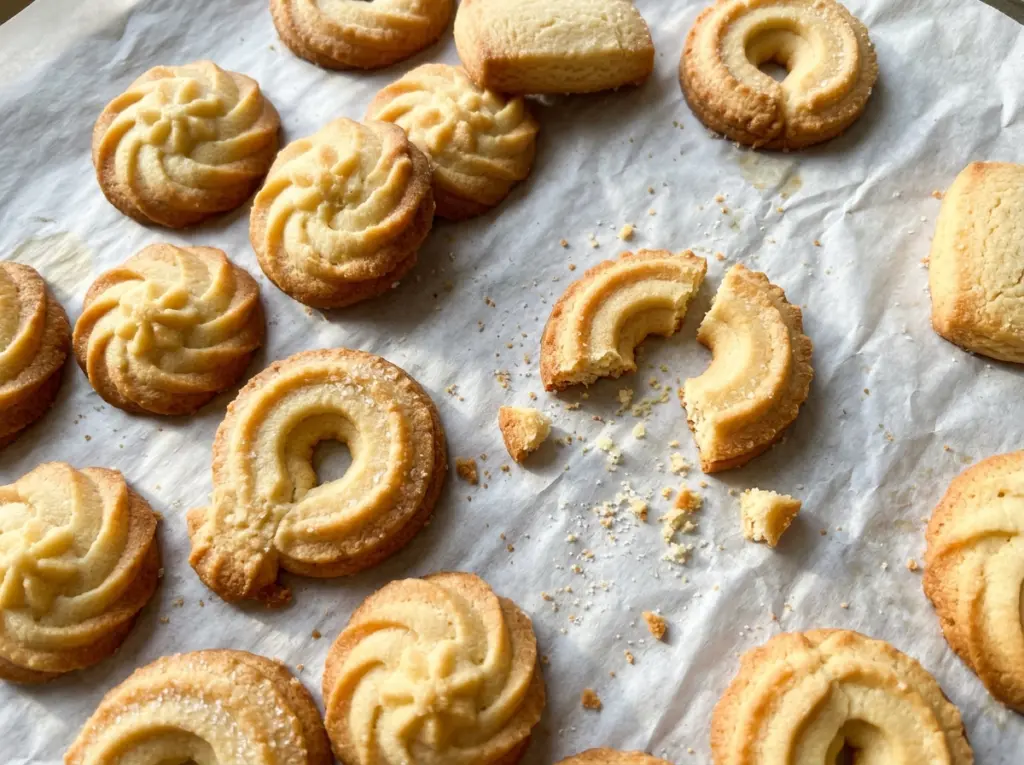
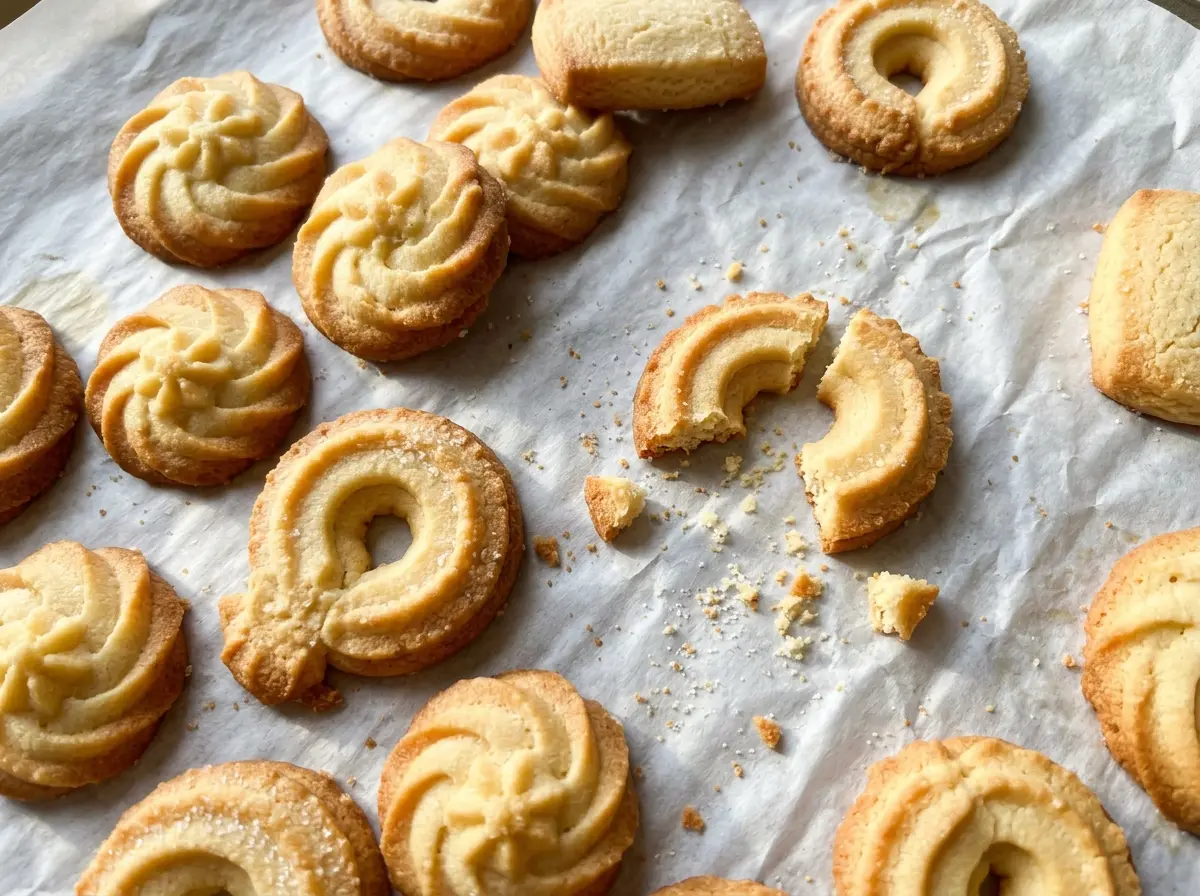
When butter and sugar turn pale and fluffy in the bowl, the dough is already on its way to the delicate, ridged cookies I want from a Danish butter cookie. The first time I piped them, I underestimated how much the warmth from my hands could soften the rings before they reached the oven. They still tasted buttery, but the grooves blurred instead of holding their shape.
Now I pipe the Danish butter cookies onto parchment, then chill the trays before baking. That short rest firms the dough after piping, so the star-tip ridges have a better chance of staying defined as the cookies bake. Keep an eye on the edges near the end: they should be lightly golden, while the centers remain pale. The finished cookies are crisp at the edges, tender inside, and full of buttery flavor.
Kitchen Note
Use a large open-star tip for these rings. A narrow tip makes the thick dough harder to pipe, and the ridges won’t look as pronounced.
Save these Danish butter cookies for a bake day when you want crisp edges and classic star-tip ridges.
Why These Rings Need a Chill Before They Hit the Oven
Butter cookie dough is soft enough to pipe, but that softness is also what makes the piped ridges vulnerable. The dough warms as you work it through the bag, and warm butter starts to melt quickly in the oven. If the rings go straight onto the baking sheets, their edges can relax before the structure sets, leaving you with flatter cookies and less definition.
Chilling the shaped cookies—not the dough before piping—firms the butter at just the right point. After 15 minutes in the refrigerator, the rings feel cooler and firmer, but they don’t need to be frozen or rock-hard. Piping first also matters: once chilled, the dough is much stiffer and takes more effort to push through the star tip. This brief pause is easy to fit in while the oven heats and helps the cookies keep the pattern you took the time to pipe.
Give the rings room on the trays, too. Spacing them about an inch apart leaves room for the edges to spread slightly without the cookies running into one another. Their shape should still be easy to recognize when they come out.
What the Butter, Egg, and Flour Contribute to the Dough

- Butter — Unsalted butter gives these cookies their rich flavor and a dough soft enough to pipe once softened. A standard store-brand stick works well; avoid tub spreads, which contain more water and can change the dough’s texture. For a dairy-free batch, use the baking-stick swap described below.
- Granulated sugar — The fine crystals beat into the butter and help give the cookies a delicate, crisp bite. Regular granulated sugar is the right choice here; brown sugar adds moisture and a deeper molasses note, changing both the color and texture.
- Egg — The egg binds the dough and helps bring the butter and sugar mixture together. Let it come to room temperature so it incorporates smoothly instead of making the butter mixture look curdled. There isn’t a dependable egg-free swap that preserves this dough’s piping texture.
- Vanilla extract — Vanilla rounds out the butter without taking over. Pure vanilla has a fuller aroma, though imitation vanilla works in this baked dough if that’s what you keep on hand. For an almond note, replace the vanilla with half as much almond extract.
- All-purpose flour — Flour gives the rings enough structure to hold their shape. Spoon it lightly into the measuring cup and level the top rather than packing it down; too much flour makes a stiff dough that’s difficult to pipe. A cup-for-cup gluten-free baking blend that includes xanthan gum is the most practical substitution, though the dough may pipe differently.
- Kosher salt — Salt sharpens the butter and vanilla flavors, so it has a quiet but useful job in a simple dough. If you’re using fine table salt instead, use a scant 1/4 teaspoon because its smaller crystals pack more densely than many kosher salts.
From Fluffy Butter to Golden Edges: The Stages That Matter
Cream the Butter and Sugar Until Pale
Heat the oven to 350°F and line two 18×13-inch baking sheets with parchment paper. In a large bowl, beat the softened butter and granulated sugar with an electric mixer on medium speed for 2 to 3 minutes. The mixture should look lighter in color and fluffy, not like dense, damp sand. Butter that is still firm won’t cream evenly, while butter that looks shiny or partly melted can leave the dough too soft.
Bring the Egg and Vanilla Into the Mixture
Beat in the room-temperature egg and vanilla until the mixture looks smooth. Pause to scrape down the sides and bottom of the bowl so no streaks of butter are left behind. If the mixture looks slightly uneven right after the egg goes in, keep mixing until it comes together. A thorough scrape now helps the finished dough bake evenly from tray to tray.
Mix in the Flour, Then Pipe the Rings
Add the flour and salt, mixing on low just until no dry flour remains. Stop there; a longer mix can make the cookies less delicate. Fit a piping bag with a large open-star tip, fill it with dough, and pipe 2-inch rings onto the parchment-lined sheets, leaving about 1 inch between them. Keep the rings close in size so they bake at a similar pace, then chill the sheets for 15 minutes.
Bake Until the Edges Turn Lightly Golden
Bake for 12 to 15 minutes, switching the sheets between racks and rotating them front to back halfway through. Look for lightly golden edges; the tops should still be much paler. Start checking near the shorter end of the baking range, since a minute or two can change the color of a small, butter-rich cookie. Cool the cookies on the sheets for 5 minutes, then move them to a wire rack to cool completely.
Three Ways to Change the Shape or Flavor
Make a dairy-free batch
Replace the unsalted butter with the same amount of a firm, unsalted dairy-free baking stick. Skip soft tub-style spreads, which can make the dough too loose to pipe cleanly. The cookies will lose some of the flavor that comes from dairy butter, and the exact texture depends on the baking stick you choose.
Pipe rosettes instead of rings
Use the same large open-star tip to pipe small rosettes rather than closing the dough into rings. Keep each shape close to the original cookies’ size and thickness so the baking time stays similar; larger or thicker rosettes need more attention near the end of baking.
Give the cookies a lemon note
Add finely grated lemon zest to the butter and sugar while creaming them. The citrus brightens the buttery dough without changing its basic shape, though the added flecks will show in the ridges. Use only the yellow outer peel and stop before the bitter white pith.
Storage and Reheating
- Room temperature: Keep completely cooled cookies in an airtight container for up to 5 days. They may soften slightly over time.
- Freezer: Freeze cooled cookies in an airtight freezer-safe container, with parchment between layers, for up to 2 months. Thaw at room temperature before serving.
- Reheating: These cookies are best at room temperature, so reheating isn’t necessary. Microwaving can soften them and take away their crisp texture.
Questions That Come Up While Making Danish Butter Cookies
Danish Butter Cookies
Ingredients
Equipment
Method
- Heat the oven to 350°F and line two 18x13-inch baking sheets with parchment paper.
- In a large bowl, beat the butter and sugar with an electric mixer on medium speed for 2 to 3 minutes, until pale and fluffy.
- Beat in the egg and vanilla until smooth, scraping down the bowl as needed.
- Add the flour and salt, and mix on low just until no dry flour remains.
- Fit a piping bag with a large open-star tip, fill it with the dough, and pipe 2-inch rings onto the prepared sheets, spacing them about 1 inch apart. Chill the sheets for 15 minutes.
- Bake for 12 to 15 minutes, switching the sheets between racks and rotating them front to back halfway through, until the edges are lightly golden.
- Cool the cookies on the sheets for 5 minutes, then transfer them to a wire rack to cool completely.


