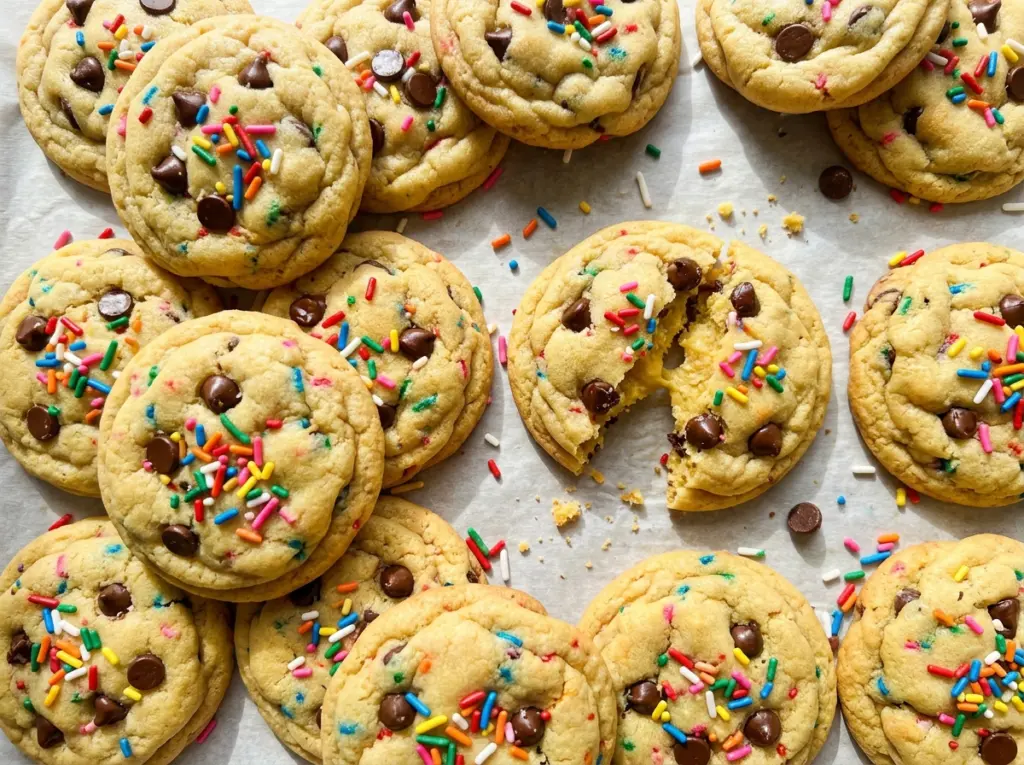
The dough turns pale gold and picks up little bursts of color as soon as the sprinkles go in; it already looks like a chocolate chip cookie with a cake-batter streak running through it. I make Cake Batter Chocolate Chip Cookies when I want the familiar buttery chew of a classic cookie with a sweeter, vanilla-cake note tucked behind the chocolate. The semisweet chips keep each bite from tipping too far into sugary territory.
Using a whole egg plus an extra yolk gives these cookies a rich, tender texture without making them cakey. The dough bakes into cookies with set edges and soft centers, and the sprinkles add color all the way through. They’re playful, but they still eat like a proper chocolate chip cookie.
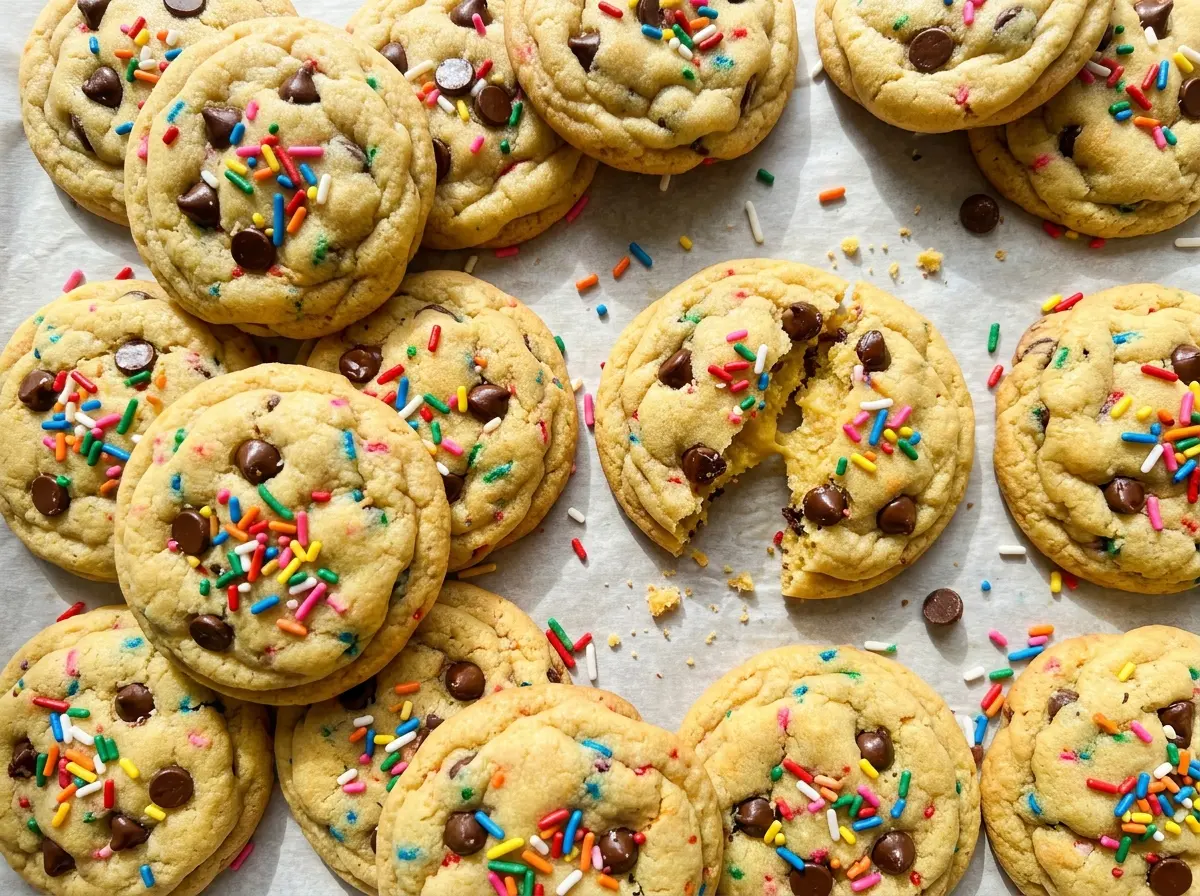
Kitchen Note
I learned not to put the next round of dough on a warm baking sheet. Let the pan cool before loading it again; warm metal starts softening the dough before it reaches the oven.
Save these Cake Batter Chocolate Chip Cookies for a bake day when you want soft centers, chocolate chips, and a bright scatter of sprinkles.
Why the Cake Mix Needs All-Purpose Flour Beside It
Dry yellow cake mix gives these cookies their cake-batter character, but it isn’t standing in for all the flour. The dough uses both cake mix and all-purpose flour because they do different jobs: the mix brings that sweet vanilla-cake taste, while the flour gives the dough the familiar structure of a chocolate chip cookie. Leave out one of them and you’ve changed more than the flavor.
The proportions matter, too. There’s an equal volume of flour and cake mix, so neither takes over the dough. That balance lets the cookies hold their shape while staying soft in the middle. The mix goes in dry; don’t prepare it into cake batter first. Adding liquid would throw off the dough and leave you with a completely different texture. It’s a small distinction, but an easy one to miss when a box of cake mix is part of a cookie recipe.
What Gives These Cookies Their Cake-Batter Flavor and Chew

- Dry yellow cake mix — Use the mix straight from the package; don’t add the ingredients needed to bake a cake. A standard yellow mix is all you need for the vanilla-cake note, and there’s no benefit to choosing a premium brand here.
- All-purpose flour — This gives the cookies their structure alongside the cake mix. Fluff the flour before measuring, then level it off so you don’t pack extra into the dough; too much can make the cookies dry and firm.
- Softened unsalted butter — Softened butter creams smoothly with the sugars; melted butter won’t give you the same starting texture. Regular grocery-store butter works well, and unsalted butter lets the recipe’s salt stay measured.
- Light brown and granulated sugars — The combination gives the dough its familiar cookie sweetness and helps the baked edges turn golden. Pack the brown sugar when measuring it so the amount stays consistent.
- Large egg and extra yolk — Use a large egg, not an extra-large one, to keep the dough proportions steady. The additional yolk adds richness without adding another white.
- Semisweet chocolate chips — They bring a little bitterness to balance the sweeter dough. Standard baking chips are a good choice; use dark chocolate chips in the same amount if you prefer a less-sweet bite.
Mix, Chill, and Bake Without Losing the Soft Centers
Whisk the Dry Ingredients Evenly
Heat the oven to 350°F and line an 18×13-inch rimmed baking sheet with parchment. Whisk the flour, dry cake mix, baking soda, and salt together in a medium bowl until the mixture looks even, with no visible clumps of cake mix. Taking a moment here helps the leavener disperse through the dough. Set the bowl aside while you cream the butter and sugars.
Cream the Butter and Sugar Until Smooth
Beat the softened butter with the packed brown sugar and granulated sugar until creamy, about 2 minutes. Scrape the bowl if you see butter caught along the sides, then beat in the egg, egg yolk, and vanilla until combined. The mixture should look cohesive rather than streaky. If the butter is too firm, it won’t cream smoothly; if it’s melted, the dough starts with a different texture.
Fold in the Chips and Sprinkles
Add the flour mixture and mix just until no dry streaks remain. Stop as soon as the flour disappears; continuing to beat the dough can make the cookies tougher. Fold in the semisweet chocolate chips and rainbow sprinkles until they’re spread through the dough. Use a folding motion so the add-ins don’t all collect at the bottom of the bowl.
Chill and Portion the Dough
Cover the bowl and refrigerate the dough for 1 hour. Once chilled, scoop it into 2-tablespoon portions and set them at least 2 inches apart on the lined baking sheet. Keeping the portions similar in size helps them bake evenly. Don’t crowd the pan; leave room for each cookie to spread.
Bake to Set Edges, Then Let the Centers Finish
Bake in batches for 10–12 minutes, until the edges are set and the centers still look soft. Don’t wait for the centers to look completely firm in the oven; they’ll continue setting as the cookies cool. Leave the cookies on the baking sheet for 5 minutes, then move them to a wire rack to cool completely. Let the sheet cool before baking another batch.
Three Easy Ways to Change Up the Cookie Dough
Use dark chocolate for a less-sweet cookie
Swap the semisweet chips for the same amount of dark chocolate chips. The cake-batter flavor still comes through, but the chocolate tastes deeper and offsets the sweet dough more sharply.
Make a gluten-free batch
Replace the all-purpose flour with a cup-for-cup gluten-free flour blend and use a gluten-free yellow cake mix in place of the regular mix. Keep the same volume for each replacement and follow the same mixing and baking method. The cookies may have a slightly more delicate or grainy texture depending on the blend.
Make the cookies dairy-free
Use softened stick-style plant butter, a dairy-free yellow cake mix, and dairy-free semisweet chocolate chips. The cookies will have a slightly different buttery flavor, but the dough still comes together with the same method. Choose a stick-style product rather than a soft tub spread for a closer texture.
Storage and Reheating
- Refrigerator: These cookies don’t need refrigeration. Keep them in an airtight container at room temperature for up to 4 days; chilling makes them firmer.
- Freezer: Freeze completely cooled cookies in an airtight container for up to 2 months. Thaw at room temperature before serving.
- Reheating: Warm one cookie briefly in the microwave, just until the chocolate softens. Don’t heat it until hot all the way through or the cookie can dry out.
Questions That Come Up While Making These Cookies
Cake Batter Chocolate Chip Cookies
Ingredients
Equipment
Method
- Preheat the oven to 350°F.
- Line an 18x13-inch rimmed baking sheet with parchment paper.
- Whisk the flour, dry cake mix, baking soda, and salt together in a medium bowl.
- In a large bowl, beat the butter, brown sugar, and granulated sugar until creamy, about 2 minutes.
- Beat in the egg, egg yolk, and vanilla until combined.
- Add the flour mixture and mix just until no dry streaks remain.
- Fold in the chocolate chips and sprinkles.
- Cover the dough and refrigerate for 1 hour.
- Scoop the dough into 2-tablespoon portions, spacing them at least 2 inches apart on the prepared baking sheet.
- Bake in batches for 10–12 minutes, until the edges are set and the centers still look soft.
- Cool the cookies on the baking sheet for 5 minutes.
- Transfer the cookies to a wire rack to cool completely.
- Let the baking sheet cool before baking the next batch.


