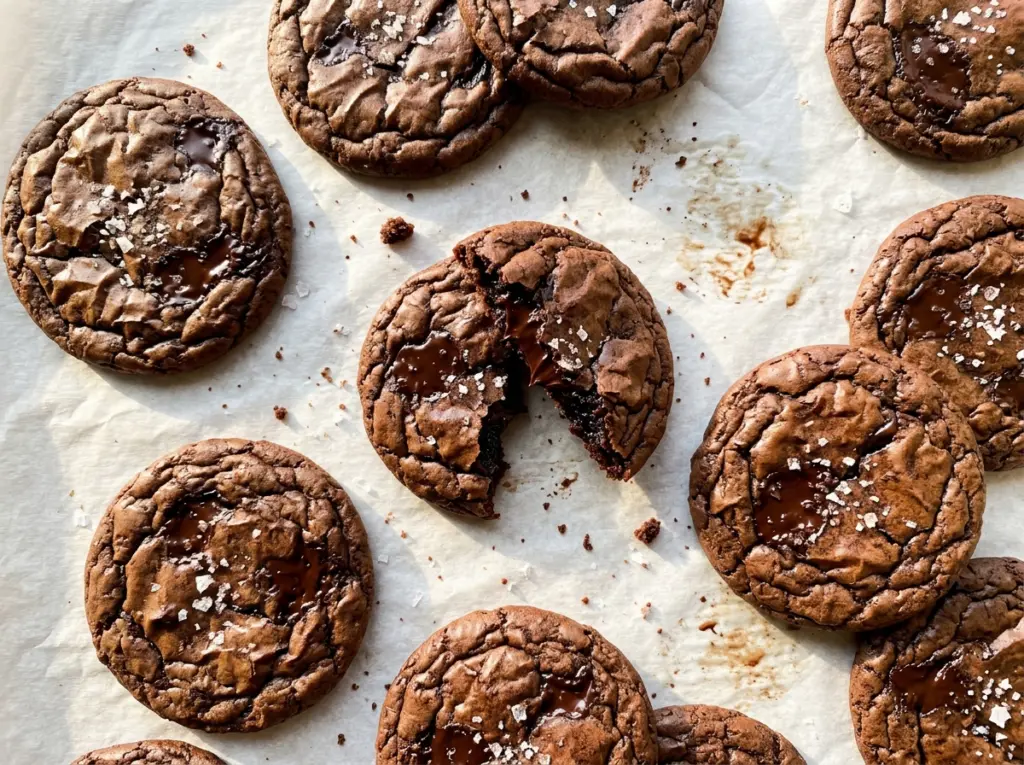
The batter looks loose right after the dry ingredients go in, which can make a spoonful seem destined to spread into a thin puddle. Give it a little time before you scoop. For these fudgy brownie cookies, a 10-minute rest thickens the batter enough to hold its shape, while the centers stay soft after baking.
I like how this dough gets its chocolate flavor from both melted semisweet chocolate and cocoa powder. The melted chocolate gives the cookies their rich, brownie-like middle; the cocoa adds another layer without asking the flour to do all the work. Beating the eggs and sugar until pale and ribbon-like also helps create the shiny, cracked tops. Once the cookies come out, their centers will still feel soft, so let them settle on the baking sheets before moving them to a rack.
Kitchen Note
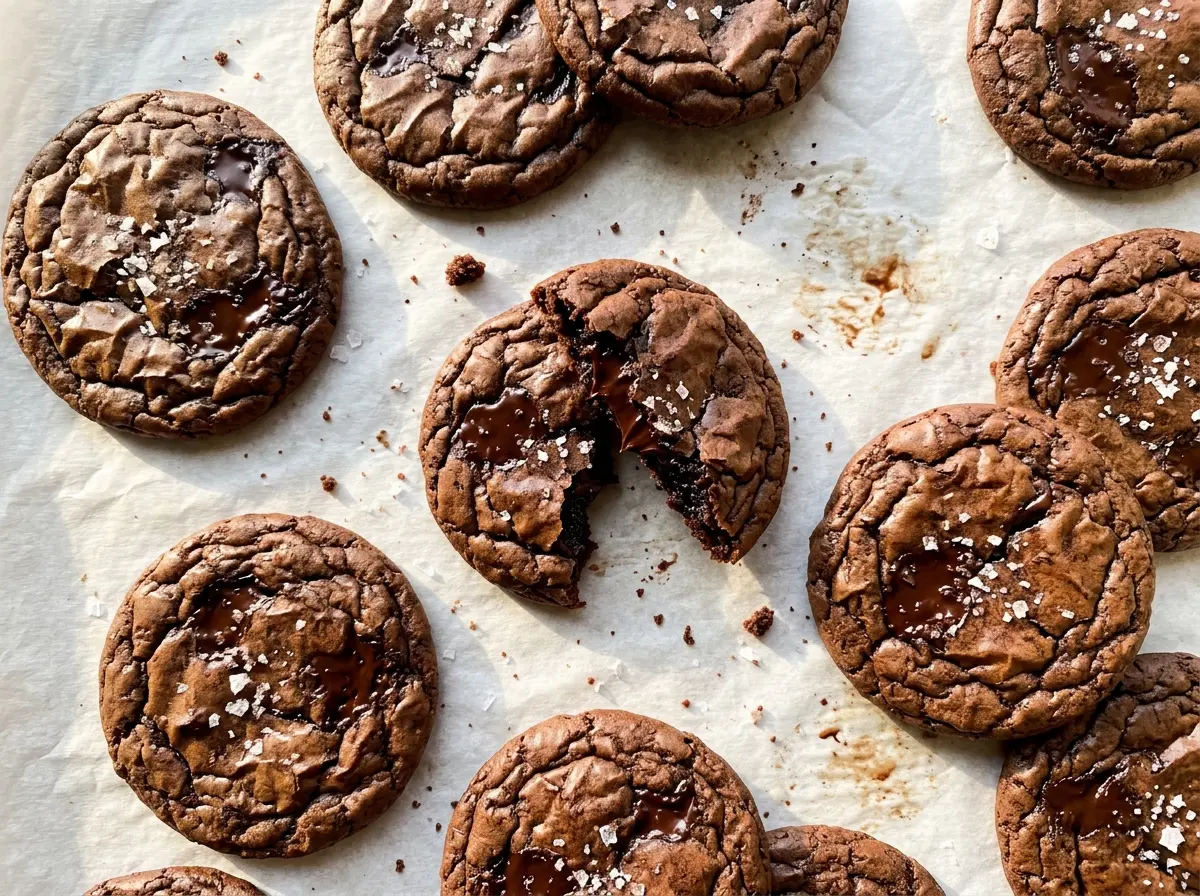
Beat the eggs and sugar until they look pale and thick, and the batter falls from the beaters in ribbons. That full 4 to 5 minutes gives the cookies their delicate, shiny tops; stopping while the mixture is still thin leaves less structure to carry through the folds.
Save these fudgy brownie cookies for a bake with shiny, crackled tops and soft, chocolate-rich centers.
Why This Brownie Batter Needs Ten Minutes Before It Hits the Pan
The batter has a different feel from ordinary drop-cookie dough. It starts with a generous amount of melted chocolate and only a modest amount of flour, so it’s soft and glossy right after mixing. If you try to scoop it at that point, the portions can slump and lose their tidy shape before they reach the oven.
Letting the batter stand for 10 minutes gives the flour and cocoa time to absorb some moisture. The change is easy to spot: instead of running off the spoon, the mixture becomes thick enough to drop in rounded spoonfuls. That brief pause also makes portioning less messy. Don’t add extra flour to fix a loose-looking batter; that can push the finished cookies away from their soft, brownie-like texture.
There’s a useful balance here: the batter should be scoopable, not stiff. If it still seems a little soft after the rest, use a spoon to portion it and trust the oven cues rather than trying to turn it into firm cookie dough.
Why These Cookies Use Both Melted Chocolate and Cocoa

- Semisweet chocolate — This is the main source of the deep chocolate body and the smooth, rich texture. Chopped chocolate melts more evenly than large chunks, and a dependable grocery-store bar works well here; take a moment to chop it into small, fairly even pieces.
- Unsweetened cocoa powder — Cocoa reinforces the chocolate flavor without adding the moisture that another portion of melted chocolate would bring. A standard unsweetened cocoa powder is a good fit; sweetened cocoa drink mix isn’t a like-for-like choice because it also brings sugar and other ingredients.
- Room-temperature eggs — Eggs whip more readily when they aren’t cold, which helps them become pale and thick with the sugar. Set them out before you begin so they’re ready to beat smoothly.
- Unsalted butter — Butter rounds out the melted chocolate, while unsalted butter lets the kosher salt remain in control of the seasoning. Use butter that’s fresh and properly stored; there’s no need to seek out a specialty brand.
- Flour, baking powder, and kosher salt — Flour gives the soft batter enough structure to hold a scoop, baking powder adds a little lift, and salt keeps the chocolate from tasting flat. Whisk these dry ingredients together first so the baking powder and salt are dispersed before folding them in.
From Smooth Melt to Crackled Cookie Tops
Melt the Chocolate Without Scorching It
Heat the oven to 350°F and line two baking sheets with parchment. Put the chopped semisweet chocolate and butter in a heatproof bowl, then microwave in 20-second bursts, stirring after each one. Stop when the mixture is smooth; chocolate can scorch if it’s left heating without a stir. Let the melted mixture cool for 5 minutes before it meets the eggs.
Whip the Eggs and Sugar to Ribbons
Beat the room-temperature eggs and granulated sugar with a hand mixer on medium-high for 4 to 5 minutes. Watch for the color to turn pale and the mixture to become thick, rather than relying on the timer alone. When you lift the beaters, the mixture should fall in ribbons that sit briefly on the surface. Beat in the vanilla once that texture is there.
Fold, Then Give the Batter a Short Rest
Fold the cooled chocolate mixture into the egg mixture until it’s combined. Whisk the flour, cocoa, baking powder, and salt separately, then fold them into the chocolate batter just until no dry streaks remain. Mixing hard after the flour disappears can make the cookies less tender, so stop as soon as the dry patches are gone. Let the batter stand for 10 minutes, until it’s thick enough to scoop.
Bake for Set Edges and Soft Centers
Drop rounded tablespoons of batter onto the prepared sheets, leaving about 2 inches between them. Bake both sheets for 9 to 11 minutes, switching and rotating their positions halfway through so they bake more evenly. Look for shiny, cracked tops and edges that have set; the centers should still be soft. The cookies will firm up as they cool, so don’t wait for the centers to feel fully firm in the oven.
Let the Cookies Set Before Moving Them
Leave the cookies on the baking sheets for 10 minutes after baking. Their soft middles are fragile while hot, and moving them right away can break them. Once they’ve rested, transfer them to a wire rack and let them cool completely.
Three Practical Ways to Adapt the Chocolate Cookie Batter
A Gluten-Free Batch
Replace the all-purpose flour with the same amount of a cup-for-cup gluten-free baking flour blend. Choose a blend made to replace wheat flour in baking; the cookies may have a slightly different crumb, but the chocolate and cocoa keep their fudgy character.
A Dairy-Free Version
Use dairy-free semisweet chocolate and the same amount of plant-based butter in place of the butter. The cookies keep their chocolate-forward center, though the butter flavor will be different. The eggs remain in the batter, so this adaptation isn’t egg-free or vegan.
A More Bittersweet Chocolate Note
Swap the semisweet chocolate for the same amount of bittersweet chocolate if you prefer a less sweet, more intense chocolate flavor. Keep the other ingredients and method unchanged; the cocoa still supports the deeper taste.
Storage and Reheating
- Room temperature: Once completely cool, keep the cookies in an airtight container for up to 3 days. They’ll soften a little as they sit.
- Freezer: Freeze completely cooled cookies in an airtight freezer-safe container, with parchment between layers, for up to 2 months. Thaw at room temperature.
- Reheating: They’re good at room temperature, but for a warm cookie, heat one briefly in the microwave. Long bursts can make the chocolate center too hot and the edges tough.
Questions That Come Up When Baking Brownie Cookies
Fudgy Brownie Cookies
Ingredients
Equipment
Method
- Heat the oven to 350°F.
- Line two baking sheets with parchment paper.
- Combine the chocolate and butter in a heatproof bowl and microwave in 20-second bursts, stirring after each, until smooth.
- Let the chocolate mixture cool for 5 minutes.
- In a large bowl, beat the eggs and sugar with a hand mixer on medium-high speed for 4 to 5 minutes, until pale, thick, and ribbon-like.
- Beat in the vanilla.
- Fold in the melted chocolate mixture until combined.
- Whisk the flour, cocoa powder, baking powder, and salt in a separate bowl.
- Fold the dry ingredients into the chocolate mixture just until no dry streaks remain.
- Let the batter stand for 10 minutes, until thick enough to scoop.
- Drop rounded tablespoons of batter onto the prepared sheets, spacing them about 2 inches apart.
- Bake both sheets for 9 to 11 minutes, switching and rotating their positions halfway through, until the tops are shiny and cracked and the edges are set while the centers remain soft.
- Cool the cookies on the baking sheets for 10 minutes.
- Transfer them to a wire rack to cool completely.


