
When the honey goes into the creamed butter and sugar, the dough loosens and turns glossy. That’s normal for these salted honey cookies, but it also means they need a little patience before they’re ready to scoop. I chill the dough until it feels firm, then give each portion a light sprinkle of flaky sea salt.
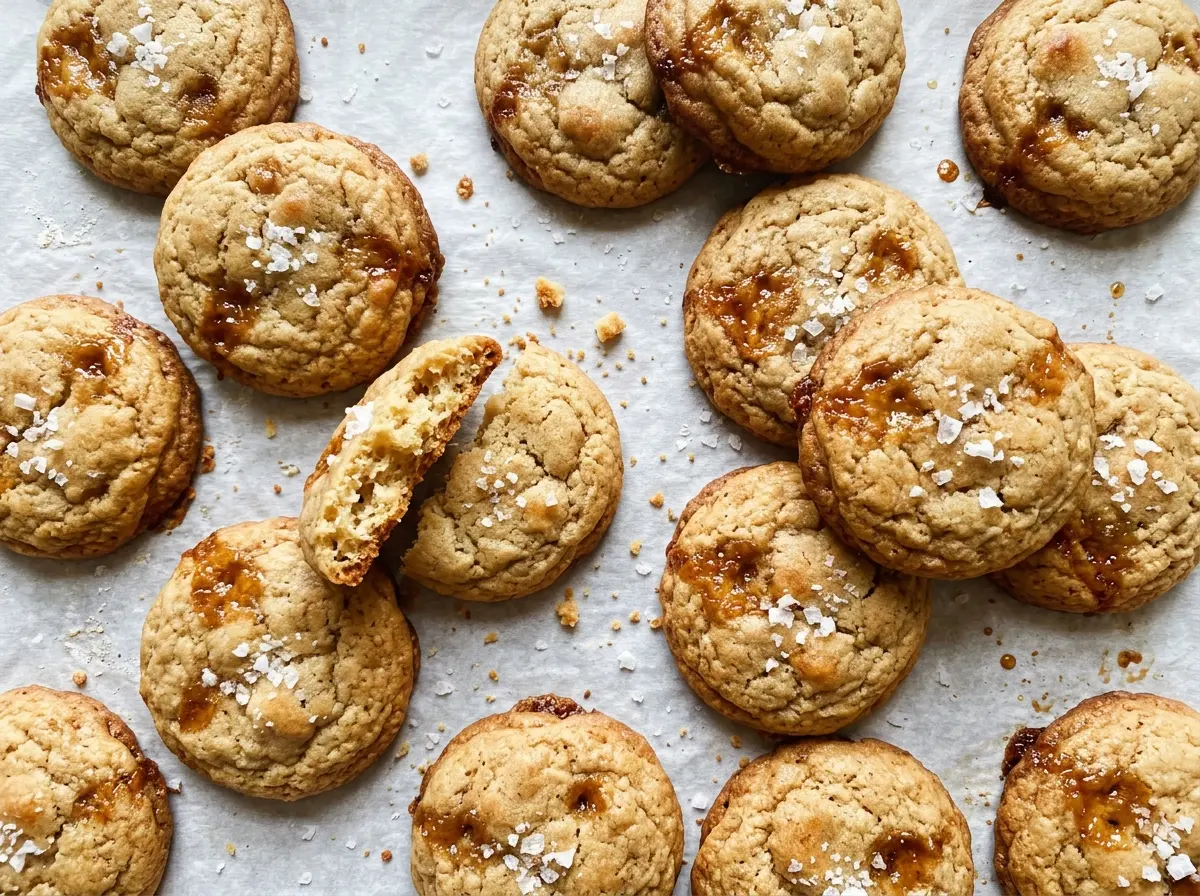
Honey brings a round, floral sweetness that you don’t get from granulated sugar alone. It also makes the dough softer, so the hour in the refrigerator isn’t a step to skip when you want tidy portions and cookies that bake evenly. The finished cookies have golden edges, tender centers, and a crisp little hit of salt on top.
This batch makes 36 cookies, and the work is straightforward once the dough is cold. Keep an eye on the edges as they bake; they turn golden before the centers look deeply browned.
Kitchen Note
Softened butter should give when you press it, but it shouldn’t look shiny or partly melted. Butter that’s too warm won’t cream properly with the sugar, so let it soften until it’s pliable rather than greasy.
Save these salted honey cookies for a bake with golden edges, tender centers, and a little flaky salt in every bite.
Why Honey Cookie Dough Needs a Cold Rest Before It Hits the Pan
Honey adds liquid as well as sweetness, so this dough starts out softer than a dough sweetened only with dry sugar. If you try to scoop it while it’s still loose, the portions are harder to handle and less likely to keep a neat shape on the baking sheet. That sticky feel isn’t a sign that you added too much honey.
During the refrigerator rest, the butter firms and the flour has time to absorb some of the moisture. The dough becomes easier to portion without needing extra flour, which could make the cookies dry or heavy. Cover it and chill for at least 1 hour, checking that it’s firm enough to scoop rather than relying on the clock alone.
This rest also makes the work more predictable: rounded portions are easier to space evenly, and you can press on the salt without the dough collapsing under your fingers. If it still feels too soft to handle after an hour, leave it in the refrigerator longer. There’s no benefit to forcing a sticky dough onto the pan.
What the Honey, Butter, and Two Salts Each Bring to These Cookies

- Honey — It gives the cookies their distinct sweetness and contributes moisture to the dough. A mild, standard honey works well; darker honey brings a more pronounced flavor. Maple syrup can stand in measure for measure, but the cookies will lose the characteristic honey note and taste more woodsy.
- Butter — Butter gives the dough richness and helps it hold air when creamed with sugar. Unsalted butter lets the salt level stay controlled, and an everyday brand is fine here; the butter should be softened, not melted.
- All-purpose flour — It supplies the structure that keeps these cookies from turning into a puddle of honey and butter. For a gluten-free batch, use a cup-for-cup gluten-free baking blend made to replace all-purpose flour; blends vary, so expect a slightly different texture from the original.
- Fine salt and flaky sea salt — Fine salt seasons the dough evenly, while the larger flakes give the tops a distinct salty crunch. Keep the fine salt in the dough, and use flaky salt for the topping; fine table salt won’t give you the same finish.
- Egg and vanilla — The egg binds the dough and helps it bake into a tender cookie. Vanilla rounds out the honey’s sweetness, so use extract rather than trying to replace it with a larger amount of a stronger flavoring.
From Creamed Butter to Golden Edges: Four Stages That Matter
Cream the butter and sugar until smooth
Beat the softened butter and granulated sugar with a mixer on medium speed until creamy, about 2 minutes. Scrape down the bowl if butter or sugar is clinging to the sides. You’re looking for a cohesive mixture with no obvious lumps of butter, not melted or oily butter. A thorough cream gives the dough an even start.
Mix in the honey, egg, and vanilla
Beat in the honey, egg, and vanilla until combined, scraping the bowl as needed. The mixture may look looser than the butter-and-sugar base; that’s expected once the honey and egg go in. Pause to scrape the bottom and sides so no pocket of plain butter is left behind. Keep mixing only until the wet ingredients are incorporated.
Add the dry ingredients and chill
Whisk the flour, baking soda, and fine salt together in a separate bowl, then add them to the butter mixture. Mix on low just until no dry flour remains; stop there so the cookies don’t become tough. Cover the dough and refrigerate it for at least 1 hour, until firm enough to scoop. Don’t add extra flour to solve stickiness while the dough is warm.
Scoop, salt, and bake one sheet at a time
Heat the oven to 350°F and line two baking sheets with parchment paper. Scoop rounded 1 1/2-tablespoon portions about 2 inches apart, then lightly press a few flakes of sea salt onto each one. Bake one sheet at a time for 10 to 12 minutes, until the edges are golden and the centers look set. Cool the cookies on the sheet for 5 minutes before moving them to a wire rack to cool completely.
Three Small Changes for a Different Take on Salted Honey Cookies
Make them dairy-free with baking sticks
Replace the unsalted butter with the same amount of dairy-free baking sticks, not soft tub spread. The cookies will still get their sweetness from the honey, though the buttery taste will be less pronounced and the texture may vary by brand.
Give the honey a citrus edge
Mix the finely grated zest of one orange into the dough with the honey, egg, and vanilla. The citrus brightens the sweetness without taking away the honey flavor; keep the zest finely grated so it disperses instead of forming chewy strips.
Trade granulated sugar for brown sugar
Use an equal measure of light brown sugar instead of granulated sugar for a warmer, caramel-like note. The cookies will taste less cleanly sweet and more molasses-forward, which pairs nicely with the honey. Keep the dough chilled until firm before scooping.
Storage and Reheating
- Refrigerator: Keep cooled cookies in an airtight container for up to 1 week. They’ll soften a little as they sit.
- Freezer: Freeze completely cooled cookies in an airtight container, with parchment between layers, for up to 2 months. Thaw at room temperature before serving.
- Reheating: These cookies are good at room temperature and don’t need reheating. If you want one warm, heat it briefly in the microwave and stop as soon as it feels warm; too much heat can make it overly soft.
Questions That Come Up While Baking Salted Honey Cookies
Salted Honey Cookies
Ingredients
Equipment
Method
- Heat the oven to 350°F.
- Line two baking sheets with parchment paper.
- In a large bowl, beat the butter and granulated sugar with a mixer on medium speed until creamy, about 2 minutes.
- Beat in the honey, egg, and vanilla until combined, scraping down the bowl as needed.
- In a separate bowl, whisk together the flour, baking soda, and fine salt.
- Add the dry ingredients to the butter mixture and mix on low just until no dry flour remains.
- Cover the dough and refrigerate for at least 1 hour, until firm enough to scoop.
- Scoop rounded 1 1/2-tablespoon portions onto the prepared baking sheets, spacing them about 2 inches apart.
- Lightly press a few flakes of sea salt onto each portion.
- Bake one sheet at a time for 10 to 12 minutes, until the edges are golden and the centers look set.
- Let the cookies cool on the baking sheet for 5 minutes.
- Transfer the cookies to a wire rack to cool completely.


