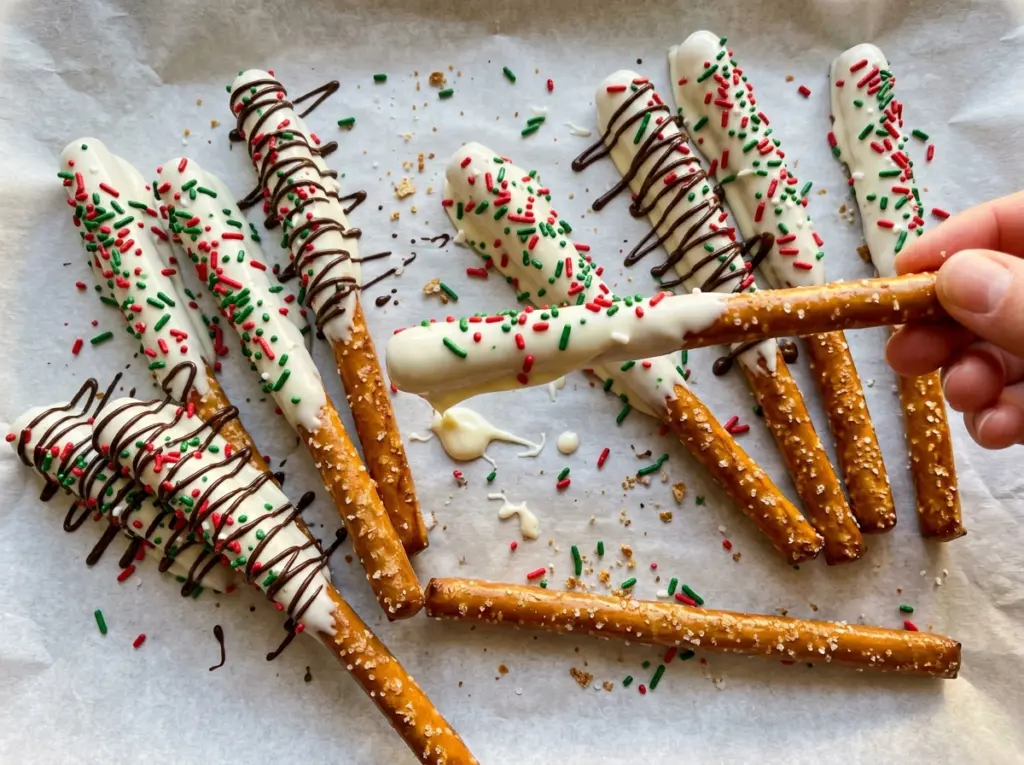
The first rod always tells me whether the chocolate is ready: if it slides off in a thick curtain, it needs another stir; if it coats smoothly and the extra drips back into the cup, you’re set. These Christmas Pretzel Rods turn a short ingredient list into a crisp, chocolate-covered treat with a festive finish, and the tall shape makes them easy to decorate without covering the whole pretzel.
I use semisweet melting wafers for the coating because they melt into a smooth dip without adding another step. Let that first layer set before adding the white chocolate, then scatter the sprinkles while the drizzle is still wet. The timing is simple, but it gives each rod a tidy contrast and helps the decorations stay put. You’ll have 24 crisp pretzel rods with a glossy chocolate shell, a white-chocolate drizzle, and a bright sprinkle finish.
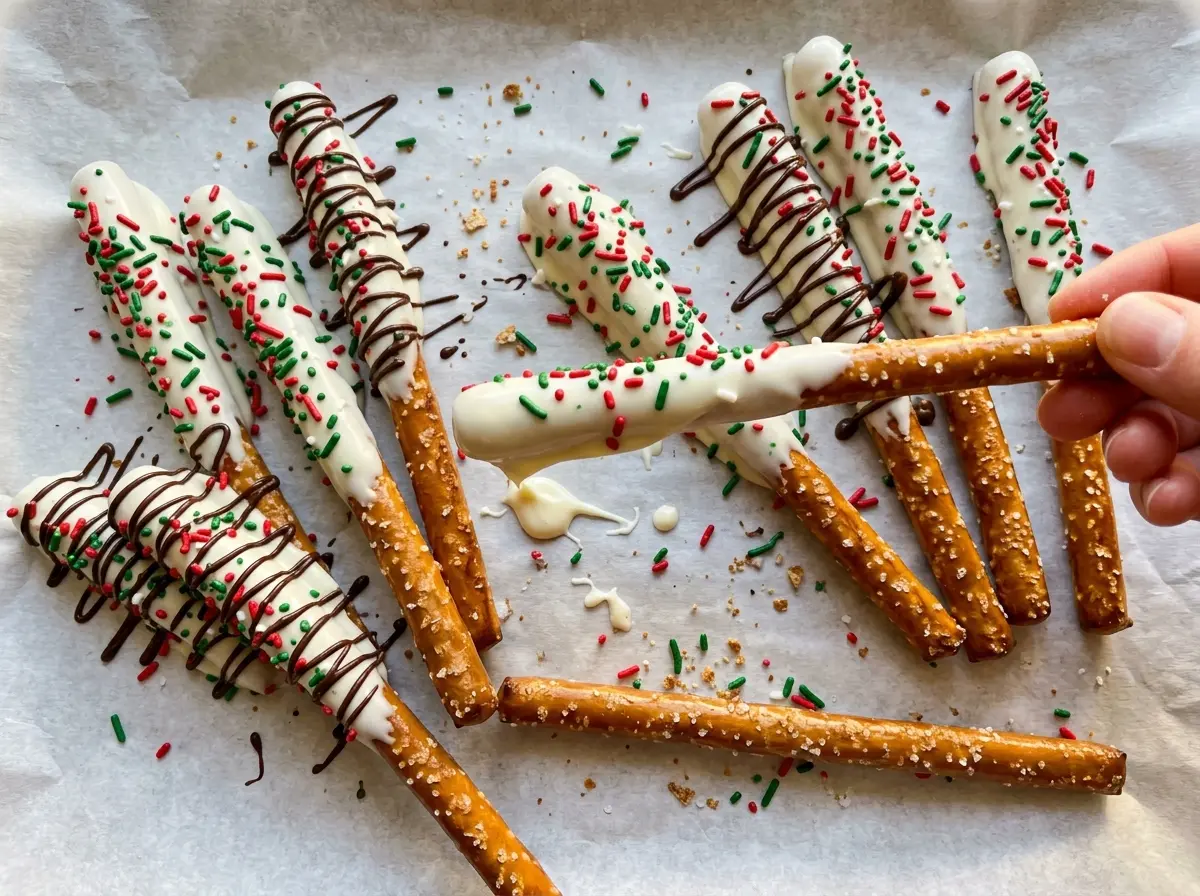
Kitchen Note
A tall measuring cup gives the rods room to dip without needing a deep pool of chocolate spread across a wide bowl. I use a narrow microwave-safe cup, and stir the wafers well between bursts so the heat finishes melting them evenly.
Save these Christmas Pretzel Rods for a festive treat with crisp pretzels, semisweet chocolate, and a bright sprinkle finish.
Why a Thin Chocolate Coat Works Better on Pretzel Rods
A heavy coating sounds appealing, but too much chocolate can hide the pretzel’s salty crunch and make each rod awkward to handle. Dipping about two-thirds of the way up leaves a bare section to hold and keeps the chocolate-to-pretzel balance pleasant. Letting the extra chocolate drip back into the cup also matters: it keeps the coating from pooling at the base when you set each rod down.
Use the parchment-lined sheets as a landing place, not a cooling rack. The rods can rest flat while the coating sets, and the parchment catches any small drips without sticking to the chocolate. Once the semisweet layer is firm, the white drizzle sits visibly on top instead of blending into a soft base. That clean contrast is what gives these simple rods their finished, decorated look.
Two rimmed baking sheets give you space to lay the dipped rods in a single layer. Keep the bare handles from touching other coated sections as you arrange them; a little room makes decorating easier and keeps the chocolate from smearing while it sets.
Why Melting Wafers Make the Coating Easier

- Pretzel rods — Their firm, straight shape makes them easy to dip and gives you a dry handle. Choose intact rods rather than broken pieces, since a crack can make dipping and lifting messy. If you need a gluten-free version, use gluten-free pretzel rods of a similar shape; the finished snack will have the same chocolate coating, though the pretzel’s crunch depends on the brand.
- Semisweet chocolate melting wafers — These are the main coating, so a smooth melt matters more than choosing a premium brand. Wafers are made to melt for dipping; chocolate chips don’t always flow as smoothly and can leave a thicker, less even coat. Stir after every short microwave burst, including when the wafers look mostly melted.
- White chocolate melting wafers — The white drizzle creates contrast against the semisweet coating. Use a clean microwave-safe bowl for this batch, so the white chocolate stays bright and the semisweet coating doesn’t tint it. If you don’t have white wafers, you can leave off the drizzle rather than trying to melt a different product that may behave differently.
- Red-and-green holiday sprinkles — These add the color and crunch that make the rods look seasonal. Any style of red-and-green sprinkles works here; choose a size you like seeing on the finished rods. If you’re out, the rods will still have their chocolate coating without them, but the decoration will be simpler.
The Dip, Set, and Drizzle Sequence
Set Up the Parchment-Lined Sheets
Line two rimmed 18×13-inch baking sheets with parchment before you melt anything. Once the chocolate is ready, you’ll want to move from dipping to setting the rods without stopping to prepare a landing spot. Arrange the sheets where they can sit undisturbed while the coating firms up. Parchment also makes it easier to lift the finished rods without pulling at the chocolate.
Melt the Semisweet Wafers Until Smooth
Put the semisweet melting wafers in a tall, microwave-safe measuring cup or narrow bowl. Microwave in 30-second bursts, stirring after each one, until the chocolate is smooth. The wafers can hold their shape even when they’re beginning to soften, so stir before deciding they need more heat. Stop once there are no solid pieces and the chocolate falls smoothly from the spoon.
Dip Two-Thirds of Each Rod
Dip each pretzel rod about two-thirds of the way into the melted chocolate, then lift it and let the excess drip back into the cup. If the coating runs off in a thick stream, pause to stir the chocolate smooth before dipping the next rod. Lay each one on a prepared sheet with a little space around it. Let the semisweet coating stand until set, about 15 minutes.
Drizzle and Add Sprinkles While Wet
Put the white melting wafers in a clean microwave-safe bowl and heat them in 20-second bursts, stirring after each, until smooth. Drizzle the white chocolate over the set rods, working in a manageable group so the drizzle is still wet when the sprinkles go on. Scatter the red-and-green sprinkles over the rods immediately after drizzling. If you wait until the white chocolate has firmed up, the sprinkles won’t stick as well.
Let the Decorations Firm Up
Leave the decorated rods on the parchment-lined sheets until the white chocolate and sprinkles are set, about 30 minutes. Avoid moving them around during this time; the drizzle can smear while it’s soft. Once the decorations feel firm, lift the rods by their uncovered ends. The finished coating should look set rather than glossy-wet.
Easy Ways to Change the Look Without Changing the Ingredients
Make a semisweet-only batch
Leave some rods with only their semisweet coating and decorate the rest with white chocolate and sprinkles. The undecorated rods have a simpler look and let the salty pretzel and semisweet chocolate stand out. This is also a practical option if you run short on time while decorating.
Vary the white-chocolate drizzle
Drizzle some rods with narrow, delicate lines and others with a wider zigzag, then scatter sprinkles over each while the white chocolate is wet. A lighter drizzle leaves more semisweet chocolate visible; a broader one gives the top a more decorated look. Keep the same listed ingredients and change only how you distribute the drizzle.
Storage and Reheating
- Room temperature: Store the set rods in an airtight container in a cool, dry spot for up to one week. Humidity can soften the pretzels.
- Freezer: Freezing isn’t the best choice for these rods; moisture during thawing can take away the pretzels’ crisp texture.
- Reheating: They don’t need reheating. Keep them away from heat, which can soften or melt the chocolate coating.
Questions About Making Christmas Pretzel Rods
Christmas Pretzel Rods
Ingredients
Equipment
Method
- Line two rimmed 18x13-inch baking sheets with parchment paper.
- Put the semisweet melting wafers in a tall, microwave-safe measuring cup or narrow bowl. Microwave in 30-second bursts, stirring after each, until smooth.
- Dip each pretzel rod about two-thirds of the way into the melted chocolate, letting excess drip back into the cup.
- Place the rods on the prepared sheets.
- Let stand until the coating is set, about 15 minutes.
- Microwave the white melting wafers in a clean microwave-safe bowl in 20-second bursts, stirring after each, until smooth.
- Drizzle the white chocolate over the rods.
- Immediately scatter the holiday sprinkles over them.
- Let the rods stand until the decorations are set, about 30 minutes.


