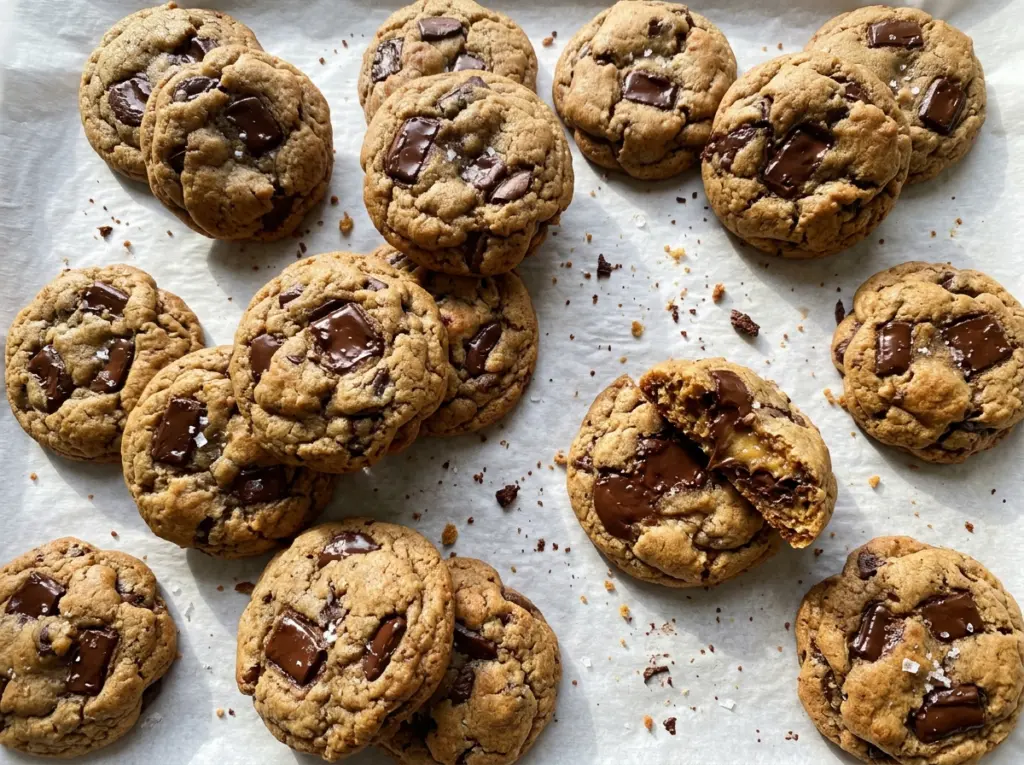
The edges turn golden before the centers look fully firm, which is exactly the point I watch for with these chocolate chunk cookies. Pull them then, and they finish setting on the hot baking sheet instead of drying out in the oven. I portion the dough into even scoops so the cookies bake at the same pace, with chocolate in every bite.
Softened butter and room-temperature eggs blend into the sugars more smoothly than cold ingredients, and that gives the dough a creamy start. Once the flour goes in, I keep the mixer on low and stop as soon as the dry streaks disappear. The dough bakes into cookies with crisp, browned edges, tender centers, and generous pockets of chocolate.
Kitchen Note
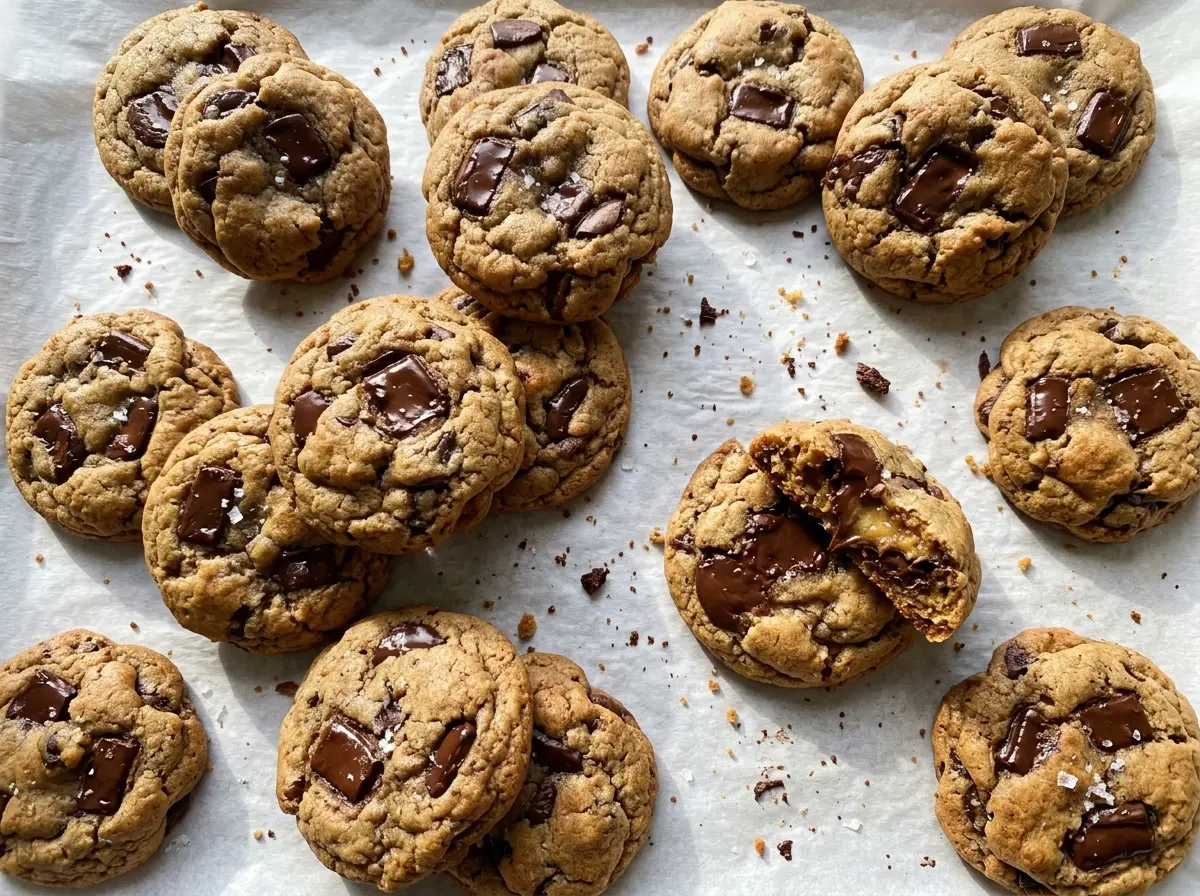
When the flour disappears, stop mixing—even a little extra beating can make the cookies tougher. I switch to folding by hand for the chocolate chunks, which keeps them spread through the dough without working it more than necessary.
Save these chocolate chunk cookies for their golden edges, soft centers, and generous pockets of chocolate.
Why Baking Both Sheets Together Calls for a Midway Switch
When two baking sheets share an oven, they don’t always brown at the same rate. Heat can be stronger near one side or rack, so the cookies on one sheet may start coloring sooner while the other batch is still pale. Rotating the sheets and switching their positions halfway through gives each batch time in both spots.
Set a timer for the midpoint of the bake, then turn each sheet around and move the upper sheet to the lower position and the lower one up. Work quickly so the oven doesn’t lose much heat. If you skip the switch, one sheet may need to come out before the other; use the cookie edges as your cue rather than assuming both trays are identical.
What the Butter, Sugars, and Chocolate Bring to These Cookies

- Butter — Unsalted butter lets the fine salt stay in balance. It should be soft enough to cream but not shiny or melted; a basic store-brand butter works well here.
- Granulated and light brown sugars — The white sugar supports browning, while the brown sugar brings moisture and a softer, chewier middle. Pack the brown sugar when measuring, and use light brown sugar for the recipe’s intended balance.
- Eggs — Room-temperature eggs blend into the creamed butter more evenly than cold ones. Set them out while you gather the other ingredients; large eggs are important for keeping the dough’s proportions right.
- All-purpose flour — Spoon it into the measuring cup and level the top rather than scooping straight from the bag, which can pack in too much. A measure-for-measure gluten-free baking flour is the most practical swap, though the cookies’ texture depends on the blend.
- Vanilla extract — It rounds out the buttery, brown-sugar flavor. Pure vanilla has a fuller aroma, but imitation vanilla works if that’s what you have.
- Baking soda and fine salt — Baking soda helps the cookies spread and brown; use a fresh box if yours has been open for a long time. Fine salt disperses evenly through the dough, so coarse salt won’t give quite the same even seasoning.
- Chocolate chunks — Chunks make broad pockets of chocolate rather than a uniform scatter of small bits. A standard bag is fine; choose chocolate you like eating on its own, since its taste comes through clearly.
From Creamed Butter to Cookies with Set Centers
Get the sheets and oven ready
Heat the oven to 350°F and line two large baking sheets with parchment paper. Lining the sheets helps the cookies release cleanly and keeps cleanup simple. Have both pans ready before mixing so the portioned dough can go straight into the oven. Leave enough room on each sheet for 12 cookies, spaced about 2 inches apart.
Cream the butter and build the dough
Beat the softened butter with the granulated and brown sugars on medium speed until creamy, about 2 minutes. Add the eggs one at a time, beating them in before adding the next, then mix in the vanilla. In a separate bowl, whisk the flour, baking soda, and salt together so the leavener isn’t clumped in one spot. Add the dry mixture on low speed and stop when no dry flour remains.
Fold in chocolate and portion evenly
Fold the chocolate chunks through the dough until they’re distributed from edge to edge. Scoop portions using 2 tablespoons of dough each; similar-sized portions bake more evenly than a mix of large and small mounds. Arrange 12 cookies on each prepared sheet with about 2 inches between them. If chunks gather at the bottom of the bowl, scrape them up and fold them into the last portions.
Bake, switch the pans, and let the cookies set
Bake both sheets for 11 to 13 minutes, rotating them and switching their positions halfway through. Look for golden edges and centers that appear just set, not deeply browned all over. Let the cookies rest on the baking sheets for 5 minutes before moving them to a wire rack. They’re delicate while hot, so give them that short rest before lifting them.
Easy Swaps That Change the Cookie Without Changing Its Character
Use bittersweet chunks for a less-sweet bite
Choose bittersweet chocolate chunks in place of the usual chunks. The cookies will have a deeper, more pronounced chocolate taste and a little less sweetness, while keeping the same chunky pockets.
Swap in dark brown sugar
Use dark brown sugar in place of the light brown sugar, measure for measure. Its stronger molasses flavor gives the cookies a richer taste; the dough may also bake up a touch darker.
Make them gluten-free with a cup-for-cup flour blend
Replace the all-purpose flour with a measure-for-measure gluten-free baking blend intended for cookies. The result can be a little more delicate, so let the cookies rest on the sheet before moving them to the rack.
Storage and Reheating
- Refrigerator: Store in an airtight container for up to 1 week; the cookies will firm up when chilled.
- Freezer: Freeze completely cooled cookies in an airtight freezer container for up to 3 months, with parchment between layers to prevent sticking.
- Reheating: Warm a cookie in a 300°F oven for about 4 minutes, just until soft. Avoid leaving it in too long, or the edges can dry out before the middle warms.
Questions That Come Up While Baking Chocolate Chunk Cookies
Chocolate Chunk Cookies
Ingredients
Equipment
Method
- Heat the oven to 350°F and line two large baking sheets with parchment paper.
- In a large bowl, beat the butter, granulated sugar, and brown sugar with an electric mixer on medium speed until creamy, about 2 minutes.
- Beat in the eggs one at a time, then mix in the vanilla until combined.
- In a separate bowl, whisk together the flour, baking soda, and salt, then add them to the butter mixture and mix on low just until no dry flour remains.
- Fold in the chocolate chunks until evenly distributed.
- Scoop the dough into 2-tablespoon portions onto the prepared sheets, spacing them about 2 inches apart, with 12 cookies per sheet.
- Bake both sheets for 11 to 13 minutes, rotating and switching their positions halfway through, until the edges are golden and the centers look just set.
- Let the cookies cool on the baking sheets for 5 minutes, then transfer them to a wire rack to cool completely.


