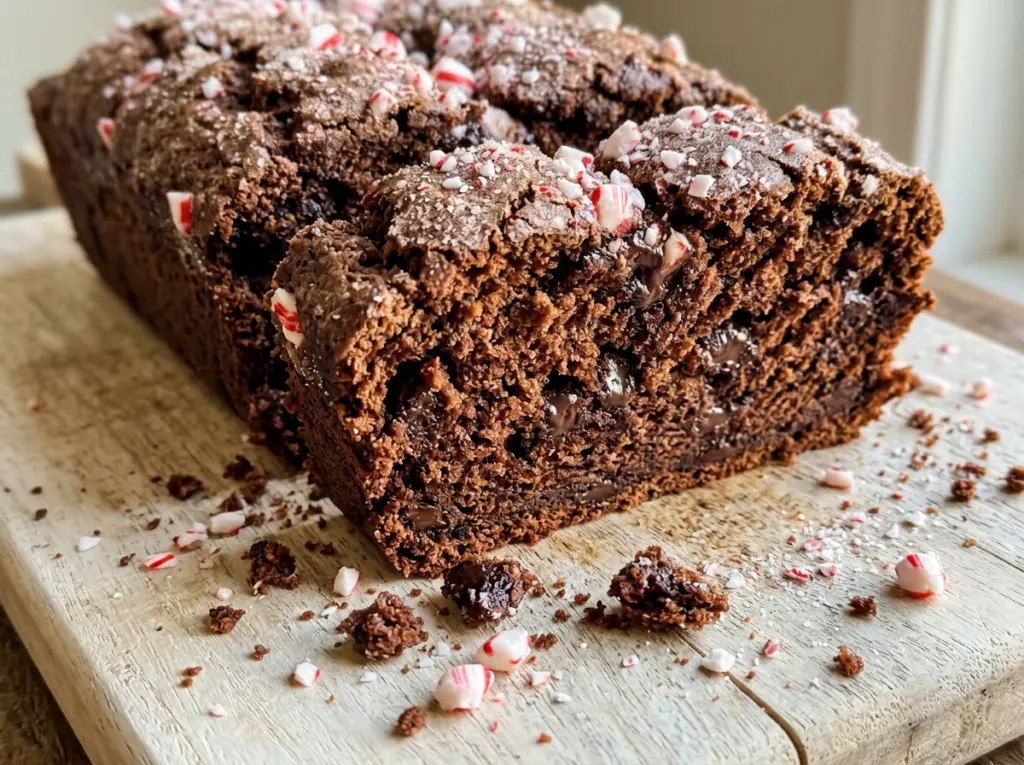
The top of this loaf looks set before the middle is ready, which makes it easy to pull it from the oven too soon—or leave it in until the crumb dries out. I look for a toothpick with a few moist crumbs rather than waiting for it to come out perfectly clean. That small distinction gives this Chocolate Peppermint Bread a tender center with chocolate chips tucked through every slice.
The batter comes together in two bowls, and there’s no mixer to haul out. Buttermilk keeps it soft while cocoa and peppermint give the loaf its familiar chocolate-mint flavor. I stir the dry ingredients into the wet just until the last flour streak disappears, then fold in the chips. It’s a straightforward loaf, but the soft crumb and cool peppermint make each slice feel a little special.
Kitchen Note
Let the melted butter cool before whisking it with the eggs. Warm butter is fine; hot butter can start cooking the eggs before the batter even reaches the pan.
Save this Chocolate Peppermint Bread for a tender chocolate crumb, a cool peppermint finish, and chocolate chips in every slice.
Why a Clean Toothpick Can Mean a Dry Chocolate Loaf
Chocolate batter makes the usual toothpick test a little less obvious. Melted chocolate chips can leave a smear on the tester, while a completely clean toothpick can mean the crumb has baked past its best point. For this loaf, the useful cue is a few moist crumbs clinging to the toothpick inserted in the center. That tells you the middle is baked through without asking the chocolate crumb to turn dry.
The loaf also keeps cooking briefly after it comes out of the oven. Cooling it in the pan for 15 minutes gives the edges time to settle before you turn it onto a wire rack, and cooling it completely lets the crumb finish setting. Cutting while it’s warm can compress the soft center and make a slice seem gummy. Give it that time, and the chocolate chips stay in distinct pockets instead of smearing through the cut surface.
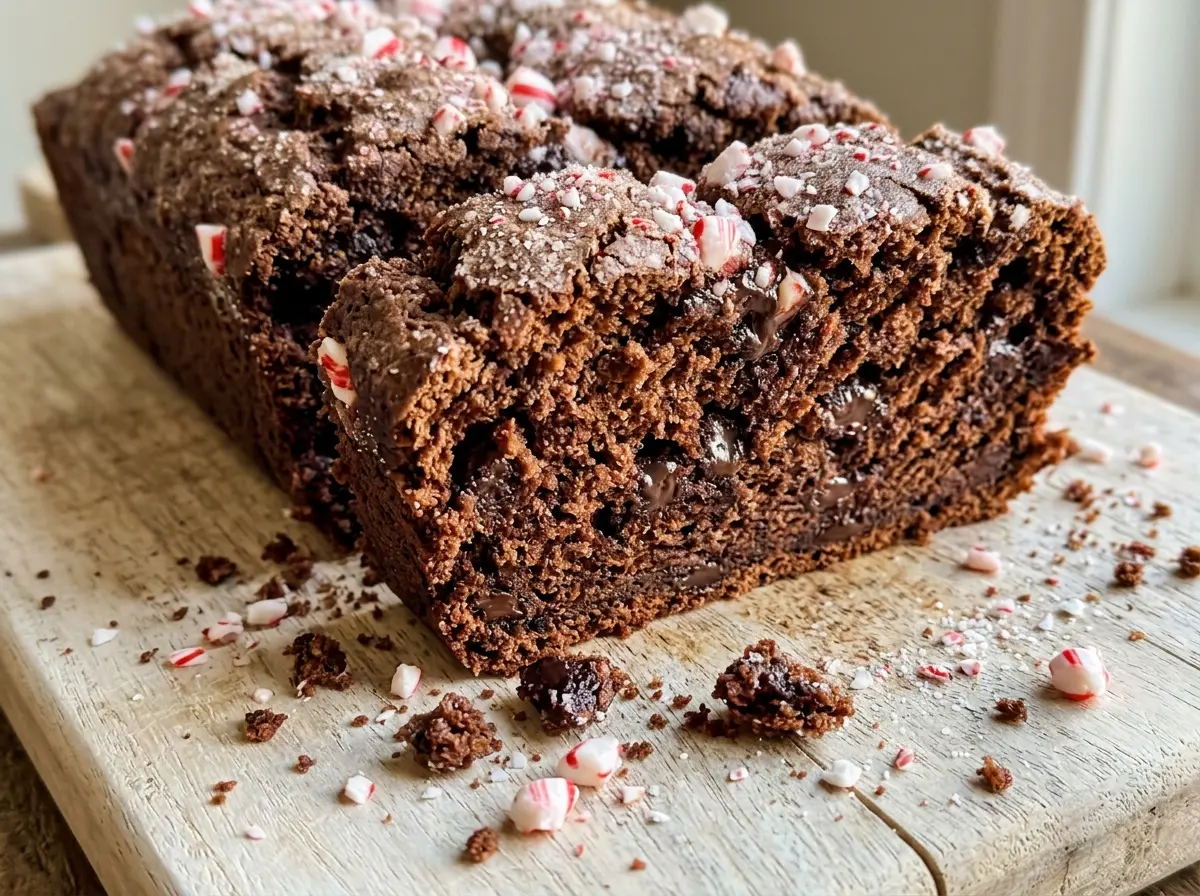
The loaf makes 10 servings, so those first few minutes of patience are worth it. A neat slice shows the dark cocoa crumb and scattered chips, with just enough peppermint to come through without taking over.
What Buttermilk, Cocoa, and Peppermint Each Bring to This Loaf

- Buttermilk — It brings moisture and a gentle tang that keeps the chocolate from tasting flat, while its acidity works with the baking soda. If you’re out, plain yogurt thinned with milk to a pourable consistency is a practical stand-in; the crumb may be a touch less delicate. Use plain, unsweetened yogurt rather than a sweetened or flavored one.
- Unsweetened cocoa powder — This gives the loaf its chocolate base without adding sugar. Use the unsweetened cocoa called for here; sweetened hot cocoa mix isn’t a swap because it brings sugar and other ingredients in different proportions. A fresher cocoa tends to have a fuller aroma, though there’s no need to buy a specialty brand.
- Peppermint extract — Extract is concentrated, so measure it carefully; the amount in the batter gives the chocolate a clear mint note without making the loaf taste like candy. Peppermint extract is not the same as mint extract, which can taste different. If you leave it out, you’ll have chocolate bread rather than peppermint bread.
- Semisweet chocolate chips — The chips add sweeter, melty pockets that contrast with the cocoa crumb. Choose a brand you like eating on its own, but standard baking chips work well here. Dark chocolate chips are an easy swap if you prefer a less-sweet bite.
- Melted butter — Butter gives the loaf richness, and melting it makes the batter easy to whisk together by hand. Unsalted butter lets the measured salt stay in control. There’s no need to brown it; that would change the flavor and add another step.
Mixing the Batter and Baking the Center Without Drying the Edges
Whisk the dry ingredients evenly
Heat the oven to 350°F and grease a 9×5-inch loaf pan. In a medium bowl, whisk together the flour, cocoa powder, baking powder, baking soda, and salt until the cocoa is evenly distributed. Cocoa can sit in small lumps, so break those up with the whisk before it meets the wet ingredients. Even mixing now helps the loaf rise evenly instead of leaving a bitter pocket of cocoa or a streak of leavener.
Build the wet mixture
In a large bowl, whisk the sugar with the melted, cooled butter until combined. Whisk in the eggs, buttermilk, vanilla extract, and peppermint extract until the mixture looks smooth. The batter may not look glossy or perfectly uniform, but there shouldn’t be streaks of egg white. If the butter is still hot, pause and let it cool before adding the eggs.
Stir just until the flour disappears
Add the dry ingredients to the wet ingredients and stir until no dry streaks remain. Don’t keep beating once the flour is incorporated; overmixing can make a quick-bread crumb tougher. Fold in the chocolate chips with a few broad strokes so they’re spread through the batter without working it more than necessary. Scrape the batter into the prepared pan and smooth it enough to reach the corners.
Use the center as your doneness check
Bake for 55–65 minutes, until a toothpick inserted in the center comes out with a few moist crumbs. Check the middle rather than judging by the edges, which bake faster in a loaf pan. If the tester comes out with wet batter, the center needs more time; if it has a few crumbs, take the loaf out rather than waiting for it to look completely dry. Cool in the pan for 15 minutes, turn it out onto a wire rack, and let it cool completely before slicing.
Three Small Changes That Give This Loaf a Different Spin
A softer peppermint finish
Leave out the peppermint extract for a straightforward chocolate loaf. The cocoa and semisweet chips still give it a full chocolate flavor, but the cool mint note disappears. This is a good option when you want the same tender loaf without the peppermint.
A darker chocolate bite
Use dark chocolate chips in place of the semisweet chips. They’ll make each pocket less sweet and let the peppermint stand out more. Keep the rest of the batter and method the same.
A gluten-free loaf
Replace the all-purpose flour with a cup-for-cup gluten-free baking flour blend that includes a binder. The batter should still be mixed only until the dry streaks disappear; the finished crumb may be a little more delicate, so let the loaf cool completely before slicing.
Storage and Reheating
- Refrigerator: Keep the completely cooled loaf tightly wrapped or in an airtight container for up to 5 days. The cold firms the crumb, so let a slice sit briefly before eating.
- Freezer: This loaf freezes well. Wrap the cooled loaf or individual slices tightly, place them in a freezer-safe container, and freeze for up to 2 months; thaw wrapped at room temperature.
- Reheating: Warm an individual slice in the microwave for about 10 seconds, then add a few more seconds if needed. Long heating makes the crumb tough and can turn the chocolate chips very hot.
Questions That Come Up When Baking Chocolate Peppermint Bread
Chocolate Peppermint Bread
Ingredients
Equipment
Method
- Heat the oven to 350°F and grease a 9x5-inch loaf pan.
- In a medium bowl, whisk together the all-purpose flour, unsweetened cocoa powder, baking powder, baking soda, and kosher salt.
- In a large bowl, whisk the granulated sugar and melted, cooled unsalted butter until combined, then whisk in the large eggs, buttermilk, vanilla extract, and peppermint extract.
- Add the dry ingredients to the wet ingredients and stir just until no dry streaks remain, then fold in the semisweet chocolate chips.
- Scrape the batter into the prepared pan and bake for 55–65 minutes, until a toothpick inserted in the center comes out with a few moist crumbs.
- Cool the bread in the pan for 15 minutes, then turn it out onto a wire rack and cool completely.


