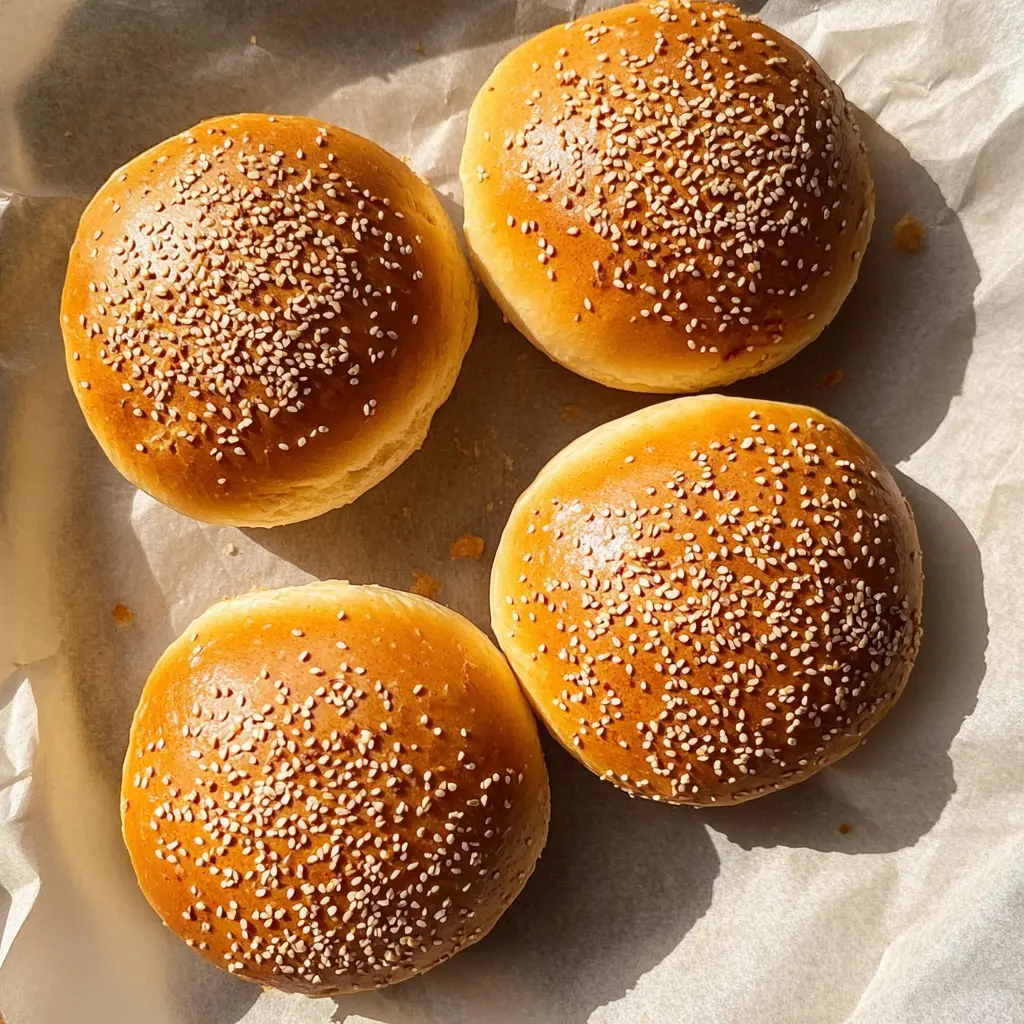
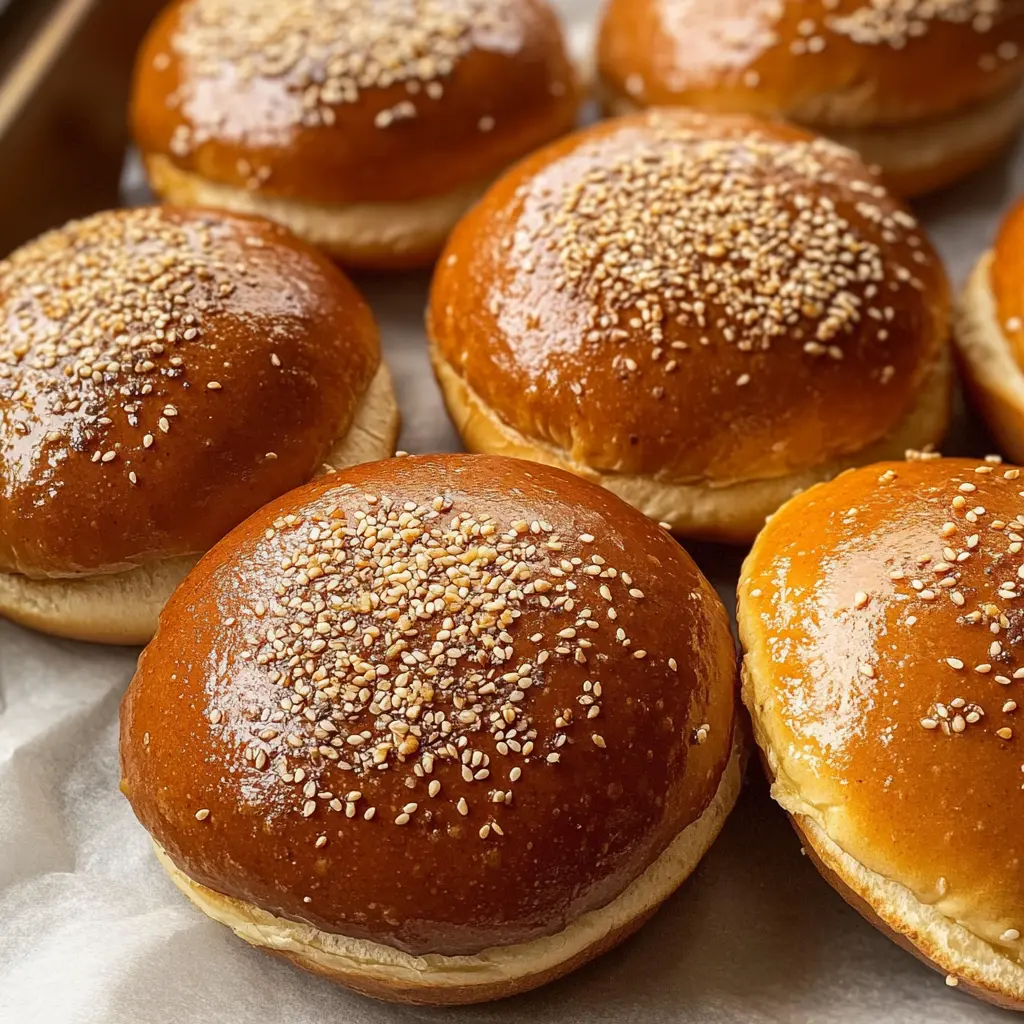
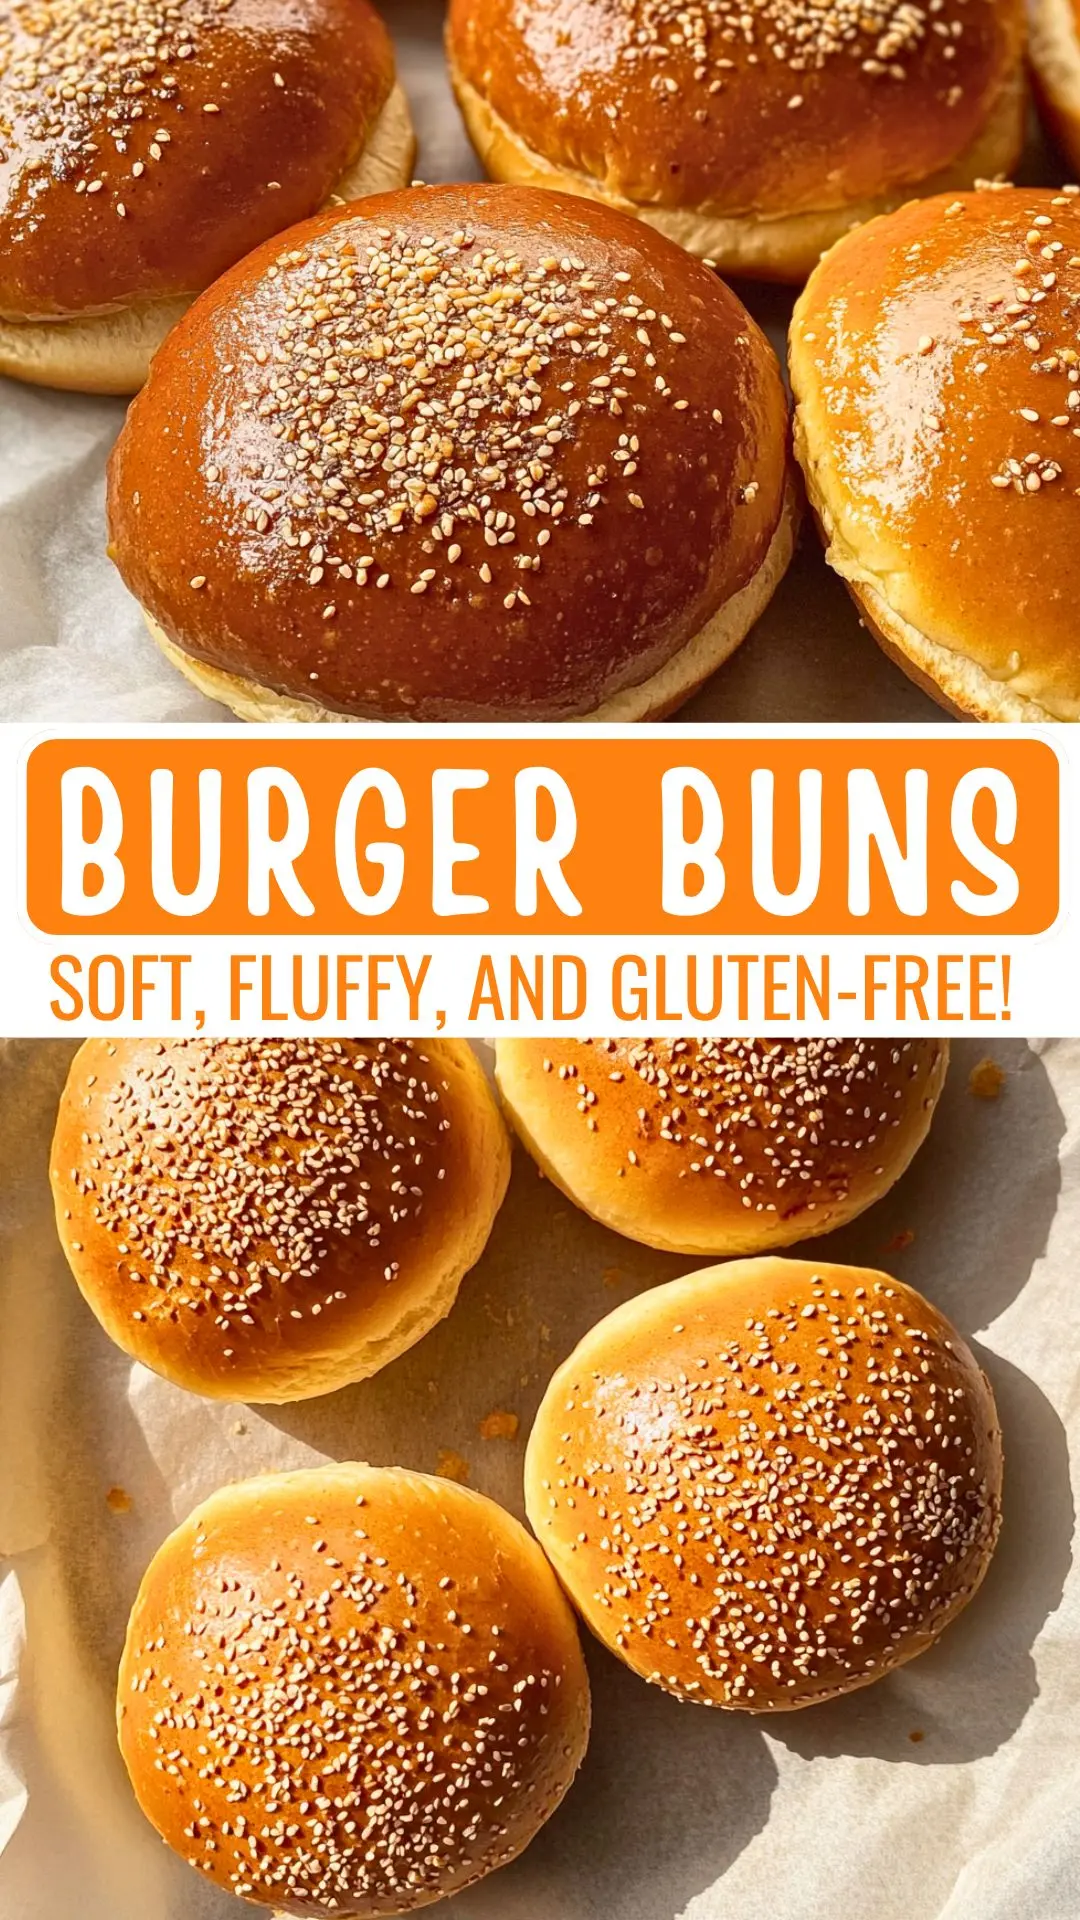
These gluten-free burger buns are soft and tasty, making them perfect for holding your favorite burger. Say goodbye to dry buns; these are fluffy and ready for all the toppings!
Making burgers at home just got easier! I love how these buns let everyone join in, no matter their diet. Toss on your favorite fixings and enjoy a meal that’s fun and stress-free!
Key Ingredients & Substitutions
Gluten-Free All-Purpose Flour Blend: This is the base for your buns. Look for blends that contain xanthan gum, which helps with the texture. If you don’t have this on hand, you can use a homemade mix of rice flour, potato starch, and tapioca flour.
Almond Flour: Almond flour adds a nice nutty flavor and moisture. If you’re allergic to nuts, you can use sunflower seed flour or more gluten-free flour instead. Just note that the flavor will change a bit.
Tapioca Starch: This gives the buns a chewy texture. If you don’t have tapioca starch, you can substitute with arrowroot flour, but I find tapioca more effective for gluten-free baking.
Instant Yeast: Using instant yeast allows you to skip the proofing step. If you have active dry yeast, you can use that but remember to activate it first in warm water with sugar before mixing it into your dough.
Olive Oil: This helps keep the buns moist. You can replace it with melted coconut oil or even avocado oil for a slightly different flavor.
How Do You Achieve the Perfect Rise for Gluten-Free Buns?
Rising gluten-free dough can be tricky, but it’s all about finding the right conditions. Since gluten-free dough is different, here are a few tips to help it rise perfectly:
- Make sure your warm water is around 110°F (43°C) — too hot can kill the yeast, and too cold can slow its activation.
- Cover your dough with a kitchen towel to keep it warm and moist while it rises. Check the dough after an hour; it should double in size.
- If your kitchen is chilly, try placing the bowl in a turned-off oven or near a heater to encourage rising.
Once risen, handle the dough gently so it maintains its airiness when shaping the buns. Happy baking!
How to Make Gluten Free Burger Buns
Ingredients You’ll Need:
For the Dough:
- 2 cups gluten-free all-purpose flour blend
- ½ cup almond flour
- ¼ cup tapioca starch
- 1 tablespoon instant yeast
- 1 tablespoon sugar
- 1 teaspoon salt
- 1 cup warm water (about 110°F/43°C)
- 3 tablespoons olive oil
- 2 large eggs
For Topping:
- Sesame seeds, for topping
How Much Time Will You Need?
This recipe will take about 1 hour for preparation, plus an additional hour for the dough to rise. You’ll spend about 25 minutes baking the buns, making the total time about 2 hours. It’s a great way to enjoy homemade gluten-free buns!
Step-by-Step Instructions:
1. Mixing the Dry Ingredients:
In a large mixing bowl, add the gluten-free all-purpose flour, almond flour, tapioca starch, instant yeast, sugar, and salt. Stir everything together well until there are no lumps left. It’s important to have a good mix, so your buns will rise nicely!
2. Preparing the Wet Ingredients:
In another bowl, whisk together the warm water, olive oil, and eggs until everything is well combined. Make sure the water is warm enough to activate the yeast, but not too hot that it cooks the eggs!
3. Combining Ingredients:
Slowly add the wet mixture to the dry ingredients, mixing as you go until you have a smooth and slightly sticky dough. You can use a wooden spoon or a spatula for this. Don’t worry if it feels a bit different from regular dough; that’s normal for gluten-free mixtures!
4. Letting the Dough Rise:
Cover the bowl with a kitchen towel and place it in a warm spot. Let the dough rise for about 1 hour, or until it has doubled in size. This is where the magic happens as the yeast works its wonders!
5. Prepping for Baking:
While the dough is rising, preheat your oven to 375°F (190°C) and line a baking sheet with parchment paper to prevent sticking. This will make clean-up much easier!
6. Shaping the Buns:
Once the dough has risen, gently punch it down to release any air bubbles. Divide the dough into equal portions and shape each portion into a round bun. Place the shaped buns on the prepared baking sheet, making sure to space them at least 2 inches apart.
7. Adding the Topping:
Brush the tops of the buns with a little olive oil. This will help them get a nice golden color while baking. Sprinkle sesame seeds generously over each bun for that classic burger bun look.
8. Baking the Buns:
Place the baking sheet in the oven and bake for 20-25 minutes, or until the buns are golden brown and sound hollow when tapped on the bottom. Keep an eye on them towards the end so they don’t overbake!
9. Cooling and Serving:
Once baked, remove the buns from the oven and let them cool on a wire rack. Once they are completely cool, slice them open and fill with your favorite burger fixings. Enjoy your delicious gluten-free burger buns!
Can I Substitute the Gluten-Free All-Purpose Flour?
Yes, you can use a different gluten-free flour blend, but make sure it contains xanthan gum or guar gum for proper texture. If your blend doesn’t contain these ingredients, consider adding 1 teaspoon of xanthan gum to help bind the dough.
How Can I Store the Leftover Buns?
To store leftover buns, wrap them tightly in plastic wrap or place them in an airtight container. They can be kept at room temperature for up to 2 days or in the fridge for up to a week. For longer storage, freeze them in a single layer on a baking sheet, then transfer to a freezer bag for up to 3 months. Thaw in the fridge or at room temperature before serving.
Can I Make the Dough Ahead of Time?
Absolutely! You can prepare the dough and let it rise, then shape the buns and refrigerate them for up to 24 hours before baking. Just cover them tightly in plastic wrap. When ready to bake, let them sit at room temperature for about 30 minutes before preheating your oven.
How Do I Know When the Buns are Done Baking?
The buns are done when they are golden brown and sound hollow when tapped on the bottom. You can also check the internal temperature; it should be around 200°F (93°C) for fully cooked gluten-free bread. Be careful not to overbake, as they can become dry!