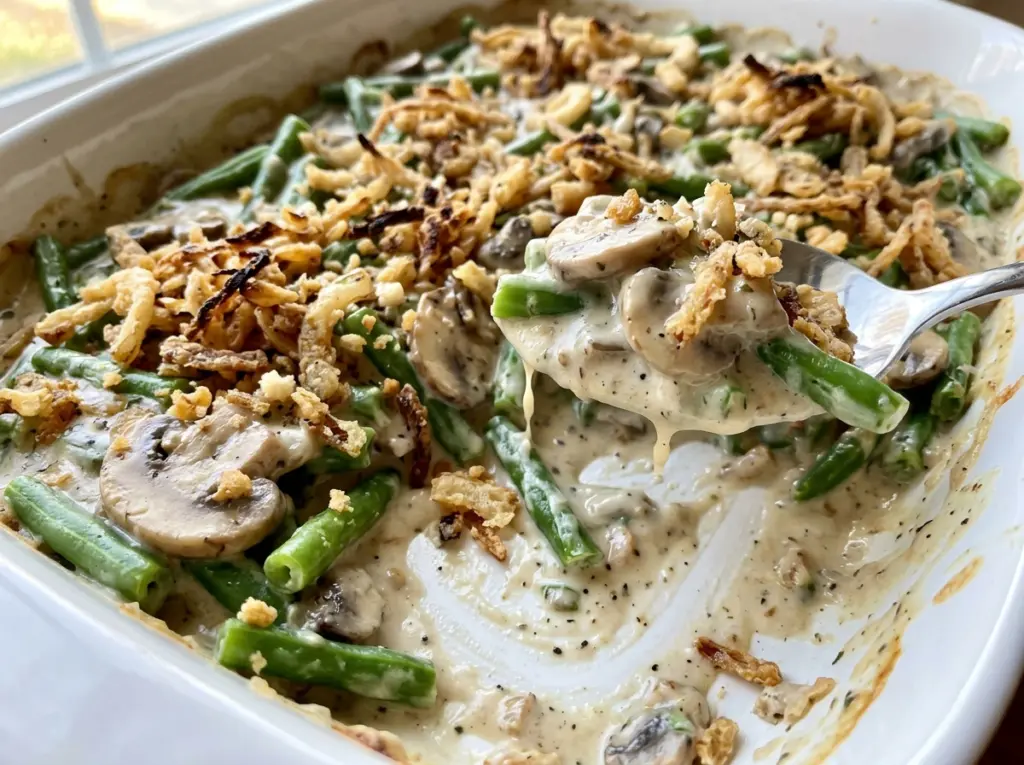
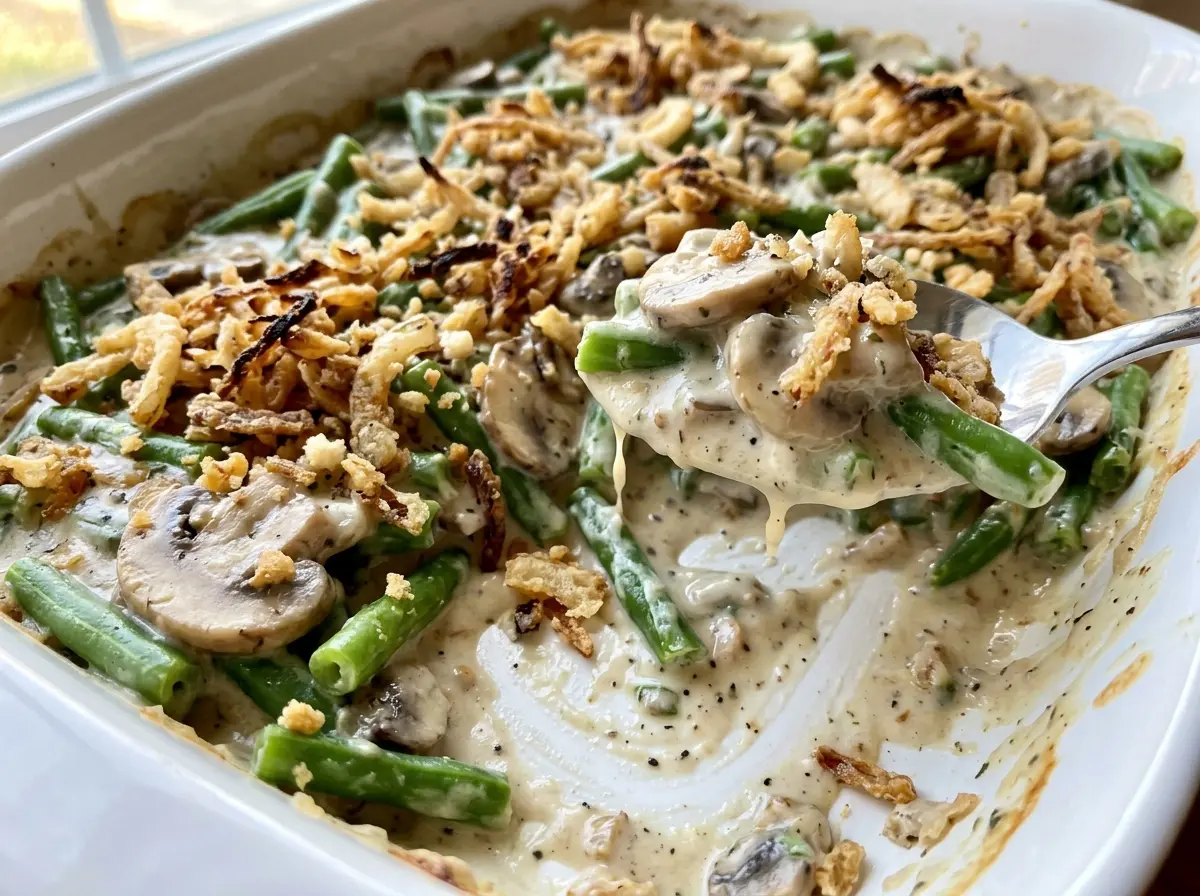
When sliced cremini mushrooms hit a hot skillet, they release more liquid than you might expect before they start to brown. Letting that moisture cook away gives this From Scratch Green Bean Casserole a savory base instead of a thin, pale sauce. I build it with fresh green beans, cream, and a smooth cornstarch slurry, so the beans keep a little bite beneath the bubbling mushroom sauce.
The crispy onions get their own moment, too: thin slices soak in buttermilk, take a light flour coating, and fry until golden. They go on after the casserole has baked, which keeps them from sitting in the creamy sauce for the full bake. Spoon into the warm casserole while the topping is still crisp and the edges are bubbling.
Kitchen Note
Drain the beans thoroughly before they go into the sauce. Any water clinging to them can loosen the creamy mixture, so I give the colander a good shake and let it finish draining while I cook the mushrooms.
Save this From Scratch Green Bean Casserole for its bubbling mushroom cream sauce and homemade golden onion topping.
Why the Onion Topping Goes on After the Casserole Bakes
A crispy topping and a creamy casserole need different amounts of time in the oven. The green beans and mushroom sauce need a full bake to heat through and bubble at the edges. Thin fried onions, on the other hand, are already cooked by the time they leave the skillet. If they go into the oven for that whole stretch, they spend longer exposed to steam from the sauce and can lose the crisp texture that makes them worth frying.
Adding the onions for just the final few minutes gives them a brief turn in the oven without burying them in the casserole. It also lets you judge the topping separately: the sauce should be bubbling around the edges before you scatter on the onions, and the topping should look crisp and golden when it comes back out. That little split in timing is what gives each part the texture it needs—tender green beans underneath and a crisp, browned layer on top.
What the Fresh Beans, Mushrooms, and Cream Bring to the Pan

- Fresh green beans — They keep a firmer, fresher bite through blanching and baking than canned beans. Frozen beans can work if you thaw them completely, pat them dry, and skip the boiling step; expect a softer texture.
- Cremini mushrooms — Their earthy flavor gives the sauce depth, and browning them well matters more than buying an expensive package. White button mushrooms are a straightforward swap; use them sliced in place of the creminis for a milder mushroom flavor.
- Low-sodium chicken broth — It loosens the cream into a savory sauce without making the casserole taste heavy. Vegetable broth swaps in measure for measure for a vegetarian version, though the sauce will taste a little less meaty.
- Heavy cream — Cream brings the rich body that makes this sauce cling to the beans. Half-and-half can replace it measure for measure for a lighter sauce; the cornstarch still helps thicken it, but the result won’t be as lush.
- Cornstarch — Whisking it into reserved broth before it reaches the skillet prevents dry clumps in the sauce. Don’t sprinkle it straight into the hot cream mixture; a smooth slurry disperses evenly.
- Yellow onion and buttermilk — A firm onion slices cleanly into rings, while the buttermilk coats those slices before the flour does. If you don’t have buttermilk, stir plain yogurt with a little milk until it has a pourable consistency and use it for the soak.
Building the Mushroom Sauce and Getting the Onion Crust Right
Blanch the Beans Until Bright and Crisp-Tender
Bring the water to a boil in a large pot, add the trimmed green beans, and cook them for 4–5 minutes. Look for a bright green color and beans that still offer a little resistance when you bite one; soft beans will soften further in the oven. Drain them well while you move on to the mushrooms. This short boil gives the beans a head start without cooking away their texture.
Brown the Mushrooms Before Adding the Cream
Melt the butter in a 12-inch skillet over medium-high heat, then add the sliced mushrooms and minced garlic. Cook for 8–10 minutes, stirring occasionally, until the mushrooms are browned and their liquid has evaporated. If the skillet still looks wet, keep cooking before adding the broth; that extra moisture would thin the sauce. Stir in all but the reserved broth along with the cream, then bring the mixture to a simmer.
Thicken, Combine, and Bake Until Bubbling
Whisk the cornstarch into the reserved broth until smooth, then stir the slurry into the skillet with the salt and pepper. Simmer for 1–2 minutes, watching for the sauce to thicken rather than leaving it watery. Fold in the beans, transfer everything to a cooking-spray-coated 9×13-inch baking dish, and bake at 375°F for 20–25 minutes. The visual cue to move on is bubbling around the edges.
Fry the Onions in Small Batches
While the casserole bakes, soak the thinly sliced onion in buttermilk for 10 minutes. Heat the canola oil in an 8-inch saucepan over medium heat to 350°F, checking with a thermometer; guessing at the oil temperature makes the coating harder to control. Let excess buttermilk drip from the onion slices, toss them lightly in flour, and fry in batches for 2–3 minutes until golden. Drain the onions on paper towels, scatter them over the baked casserole, and return it to the oven for 5 minutes until the topping is crisp and golden.
Simple Swaps for a Different Table
Make the casserole vegetarian
Replace the chicken broth with vegetable broth in the same quantity. The creamy mushroom sauce will still thicken the same way, with a gentler savory flavor and no change to the cooking method.
Coat the onions gluten-free
Use a cup-for-cup gluten-free flour blend in place of the all-purpose flour for coating the onion slices. The crust may have a slightly different texture, but the buttermilk soak and frying method stay the same; check that the blend is suitable for coating and frying.
Use half-and-half for a lighter sauce
Swap the heavy cream measure for measure with half-and-half. The sauce will be less rich, so keep the cornstarch slurry in the method to help it coat the beans.
Storage and Reheating
- Refrigerator: Refrigerate leftovers within 2 hours and keep them covered for 3–4 days. The onion topping will soften as it sits against the sauce.
- Freezer: It can be frozen in an airtight container for up to 2 months, but the cream sauce may separate slightly and the onions won’t stay crisp. Freeze in portions if you want easier thawing.
- Reheating: Warm leftovers in a 350°F oven until the center reaches 165°F. The microwave works for a quick portion, but it softens the fried onions further.
Questions That Come Up Before the Casserole Goes in the Oven
From Scratch Green Bean Casserole
Ingredients
Equipment
Method
- Preheat the oven to 375°F and coat a 9x13-inch baking dish with cooking spray.
- Bring the 4 quarts of water to a boil in a large pot, add the green beans, and cook for 4–5 minutes until bright green and crisp-tender; drain well.
- Melt the butter in a 12-inch skillet over medium-high heat, add the mushrooms and garlic, and cook for 8–10 minutes, stirring occasionally, until browned and their liquid has evaporated.
- Reserve 2 tablespoons of the broth, then add the remaining broth and the cream to the skillet; bring to a simmer.
- Whisk the cornstarch into the reserved broth until smooth, stir it into the skillet with the salt and pepper, and simmer for 1–2 minutes until the sauce thickens.
- Fold the green beans into the sauce, transfer the mixture to the prepared baking dish, and bake for 20–25 minutes until bubbling around the edges.
- While the casserole bakes, soak the sliced onion in the buttermilk for 10 minutes.
- Heat the canola oil in an 8-inch saucepan over medium heat to 350°F, checking the temperature with a thermometer.
- Lift the onion slices from the buttermilk, let the excess drip off, and toss them in the flour until lightly coated.
- Fry the onions in batches for 2–3 minutes per batch until golden, then drain on paper towels.
- Scatter the fried onions over the casserole and bake for 5 minutes until the topping is crisp and golden.


