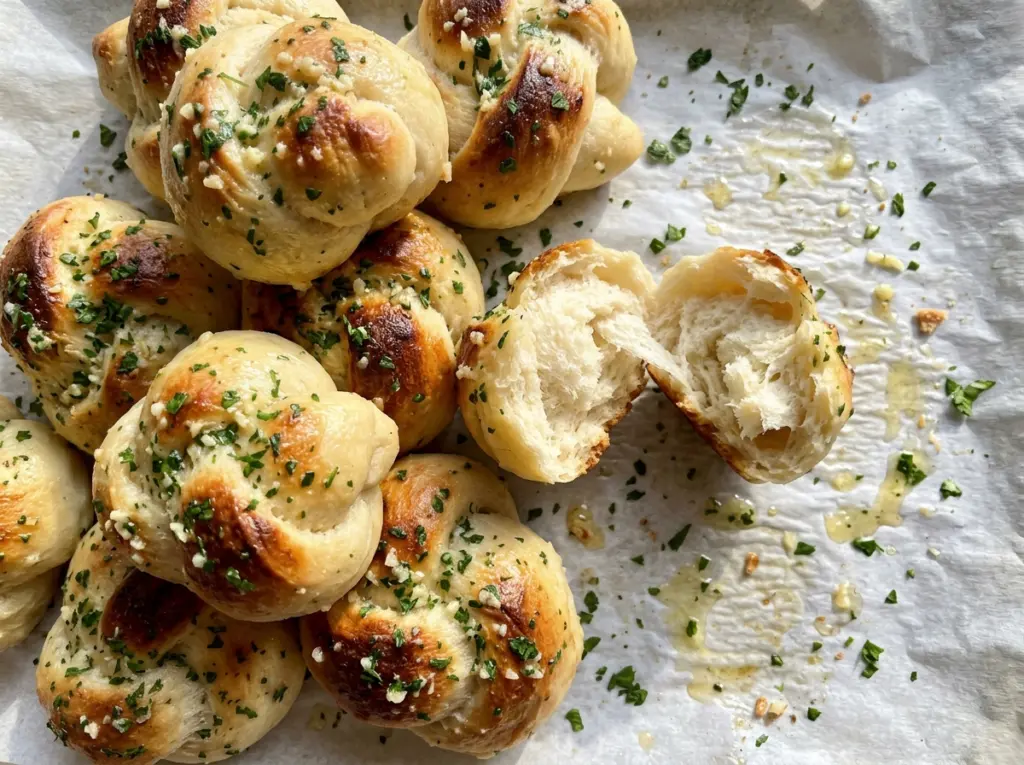
As the knots turn golden in the oven, the garlic butter is already warming on the stove, and that timing makes the last few minutes smell especially good. Garlic knots are easy to rush, though: dough that hasn’t risen enough bakes up tight, and garlic left too long over heat can taste sharp and bitter. I like this version because each stage has a clear cue, from foamy yeast to puffy knots ready for the oven.
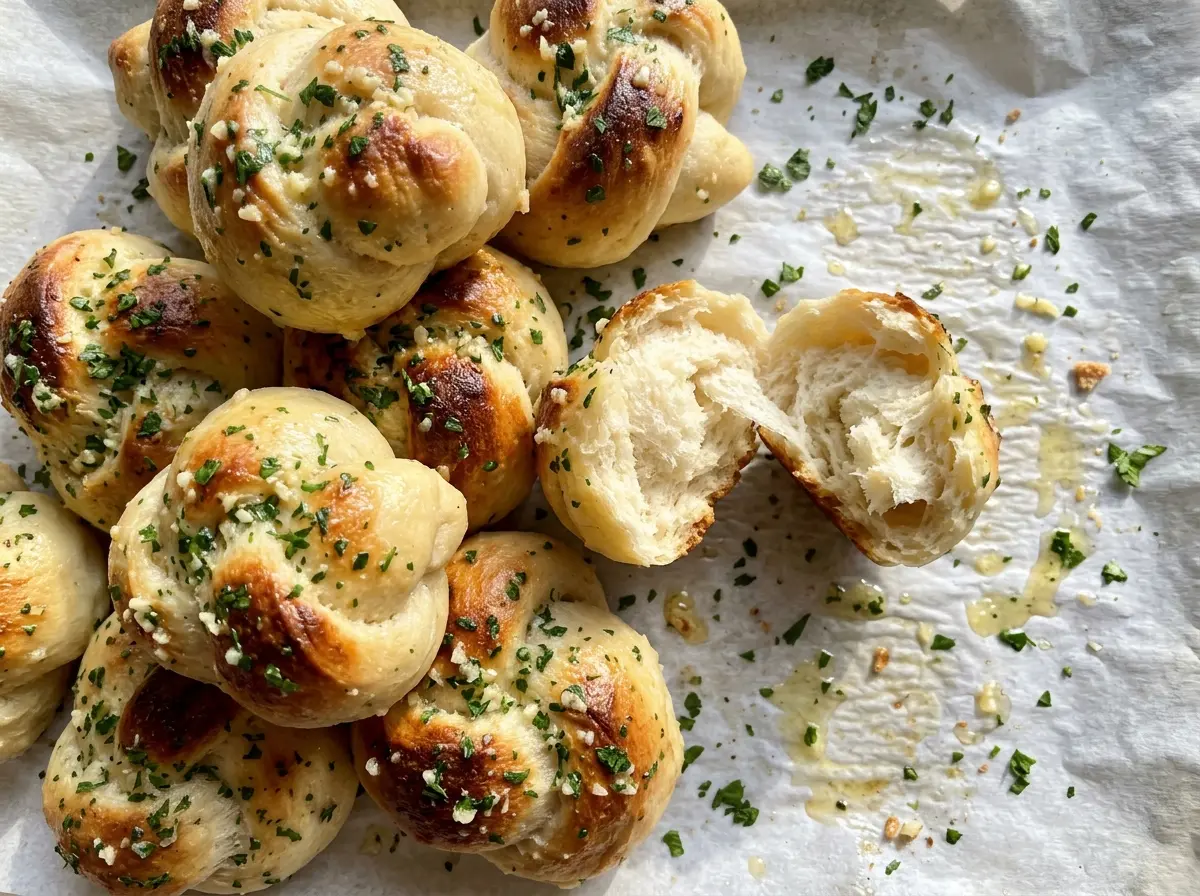
The dough gets a full first rise, then another short one after it’s tied. That second rest gives the knots a chance to puff again instead of baking up dense. I also keep the garlic butter on low heat while the knots bake, so it’s ready to brush over them while they’re still warm. The finished knots have a tender middle, a golden outside, and garlic butter tucked into all those little folds.
Kitchen Note
Mince the garlic evenly before it goes into the butter. The pieces cook quickly, and evenly sized bits are less likely to leave you with a few sharp, undercooked bites among softer ones.
Save these garlic knots for a homemade bread basket: soft centers, golden tops, and a warm garlic-parsley butter finish.
Why One Rise Won’t Give These Knots Their Soft, Puffy Centers
Shaping changes the dough. Once you divide it and tie each piece, you’ve handled and tightened it again, so the rise before shaping isn’t the only rest that matters. Giving the knots 20 to 30 minutes to puff on the baking sheet lets them relax and expand in their final shape. Skip that pause and they’re more likely to bake up compact, with less of the tender interior that makes a good garlic knot worth reaching for.
The dough’s first rise and the shorter rise after shaping do different jobs. The first gives the dough time to grow until doubled; the second gives the shaped knots a chance to become visibly puffy before they go into the oven. Use the dough itself as your guide, not just the clock. A warm spot helps the first rise along, while a drafty or cool kitchen can make it take longer to reach that doubled size. Set up the baking sheet before shaping so the knots can go straight onto it and rise without an unnecessary wait.
What the Flour, Oil, and Garlic Butter Each Bring to the Dough

- All-purpose flour — It gives the knots enough structure to hold their shape while staying tender. Fluff the flour before measuring so it doesn’t get packed into the cup; too much flour makes a stiff dough that’s harder to roll into even ropes.
- Active dry yeast — This is what gives the dough its rise. Check that it’s within date and let it stand in the warm water and sugar until foamy before building the dough. Water that’s too hot can damage the yeast, so keep it in the 105–110°F range.
- Olive oil — Oil in the dough helps keep the crumb tender, and the coating on the bowl keeps the dough from drying as it rises. The oil brushed on before baking also helps the knots brown. A basic olive oil is fine here; there’s no need to use a prized finishing oil.
- Unsalted butter and fresh garlic — Butter makes a rich coating, while fresh minced garlic gives it a fuller, fresher taste than dried garlic. Fresh cloves are worth using for this short-cooked topping. Keep the garlic ready before melting the butter so it can go in as soon as the butter is warm.
- Fresh parsley and kosher salt — Parsley brings a clean herbal note to the rich butter, and the divided salt seasons both the dough and its finish. Chop the parsley while the knots bake, then stir it into the butter off the heat so its color and fresh taste stay bright.
From Foamy Yeast to Butter-Brushed Knots
Wake Up the Yeast and Make a Shaggy Dough
Stir the warm water, active dry yeast, and sugar together in a large bowl, then let the mixture stand for 5–10 minutes. It should look foamy on top; if it stays flat, the yeast hasn’t shown the activity you want before adding flour. Stir in the flour, 1 teaspoon of the kosher salt, and 1 tablespoon of the olive oil until no dry patches remain and a shaggy dough forms. It won’t look perfectly smooth yet, and that’s expected before kneading.
Knead Until Smooth, Then Let the Dough Double
Turn the dough onto a clean counter and knead for 7–8 minutes, working it until it feels smooth and elastic rather than rough and torn. If you stop while it’s still ragged, the finished knots can have a heavier texture. Coat the bowl with 1 teaspoon of olive oil, return the dough, and turn it so the surface is lightly coated. Cover it and let it rise in a warm place for 1–1 1/2 hours, until doubled; the dough’s size is a better cue than the clock alone.
Shape Twelve Knots and Give Them a Second Rise
Line a large baking sheet with parchment and divide the dough into 12 equal pieces. Roll each piece into an 8-inch rope, then tie it into a knot and set it on the prepared sheet. Try to keep the portions close in size so they bake at the same pace. Cover the knots loosely and let them rise for 20–30 minutes, until puffy; if they still look tight and flat, give them a little more time before baking.
Bake Until Golden and Brush While Warm
Heat the oven to 400°F and brush the risen knots with the remaining 2 teaspoons of olive oil. Bake for 15–18 minutes, until the tops are golden brown. While they bake, melt the butter in a small saucepan over low heat, add the minced garlic, and cook for 30–60 seconds, until fragrant. Take the saucepan off the heat, stir in the parsley and remaining 1/4 teaspoon salt, then brush the garlic butter generously over the warm knots and serve.
Two Easy Ways to Change the Garlic Knot Finish
Dairy-Free Garlic Knots
Replace the butter with 4 tablespoons olive oil and warm it gently with the garlic, then stir in the parsley and salt off the heat. The coating will be lighter and less rich than butter, but the garlic and parsley still cling to the warm knots. The olive oil already used in the dough makes this a straightforward swap.
Garlic Knots Without Parsley
Leave out the chopped parsley if you want the garlic butter to taste more direct and savory. Keep the butter, garlic, and salt the same, and brush the mixture over the knots while they’re warm. The topping will lose its fresh green note but still brings plenty of garlic flavor.
Storage and Reheating
- Refrigerator: Store cooled knots in an airtight container for up to 3 days. The crumb will firm up faster in the refrigerator than at room temperature.
- Freezer: Freeze cooled knots in an airtight freezer bag for up to 2 months. Thaw them before reheating so the outside doesn’t dry out while the centers warm.
- Reheating: Warm them in a 400°F oven just until heated through. Don’t leave them in longer than needed; that dries the bread and can make the garlic topping taste overcooked.
Questions That Come Up When Making Garlic Knots
Garlic Knots
Ingredients
Equipment
Method
- Stir the warm water, yeast, and sugar together in a large bowl.
- Let stand for 5–10 minutes, until foamy.
- Add the flour, 1 teaspoon of the salt, and 1 tablespoon of the olive oil; stir until a shaggy dough forms.
- Knead the dough on a clean counter for 7–8 minutes, until smooth and elastic.
- Coat the bowl with 1 teaspoon of the olive oil, return the dough to the bowl, and turn it to coat.
- Cover and let rise in a warm place for 1–1 1/2 hours, until doubled.
- Line a large baking sheet with parchment paper.
- Divide the dough into 12 equal pieces.
- Roll each piece into an 8-inch rope and tie it into a knot.
- Place the knots on the baking sheet, cover loosely, and let rise for 20–30 minutes, until puffy.
- Heat the oven to 400°F.
- Brush the knots with the remaining 2 teaspoons olive oil.
- Bake for 15–18 minutes, until golden brown.
- While the knots bake, melt the butter in a small saucepan over low heat.
- Add the garlic and cook for 30–60 seconds, until fragrant.
- Remove from the heat and stir in the parsley and remaining 1/4 teaspoon salt.
- Brush the warm knots generously with the garlic butter and serve.


