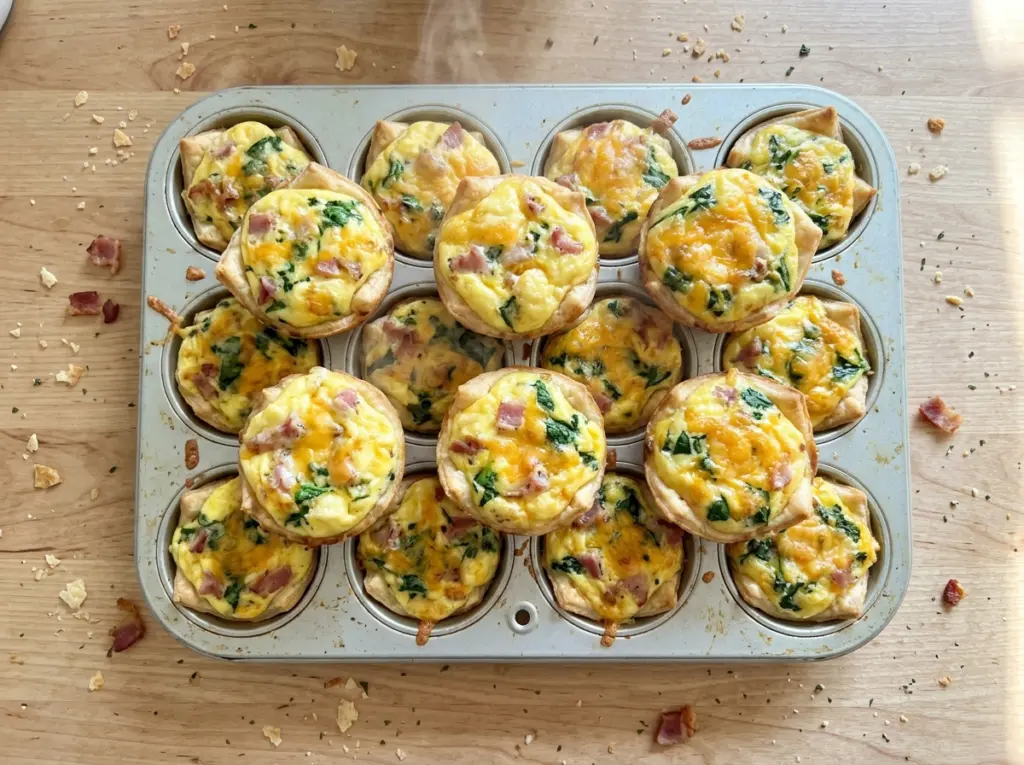
The pastry rims brown before the egg centers look completely firm, which can make these muffin tin mini quiches seem as if they need more time. I use the crust color and the center temperature together; a golden edge alone doesn’t tell you whether the middle has set.
The round of dough needs to sit comfortably in each muffin cup, not be pulled tight to reach the bottom. I cut the rounds to the specified size and pleat the edges where the dough overlaps. That little bit of slack helps the pastry keep its shape as it bakes.
Bacon cooks in the same skillet that softens the onion, so the filling gets savory flavor without another pan. Add the cheddar and egg mixture to the crust cups, leave a little room below each rim, and bake until the centers are set. The result is a tender egg filling tucked into crisp, golden pastry.
Kitchen Note
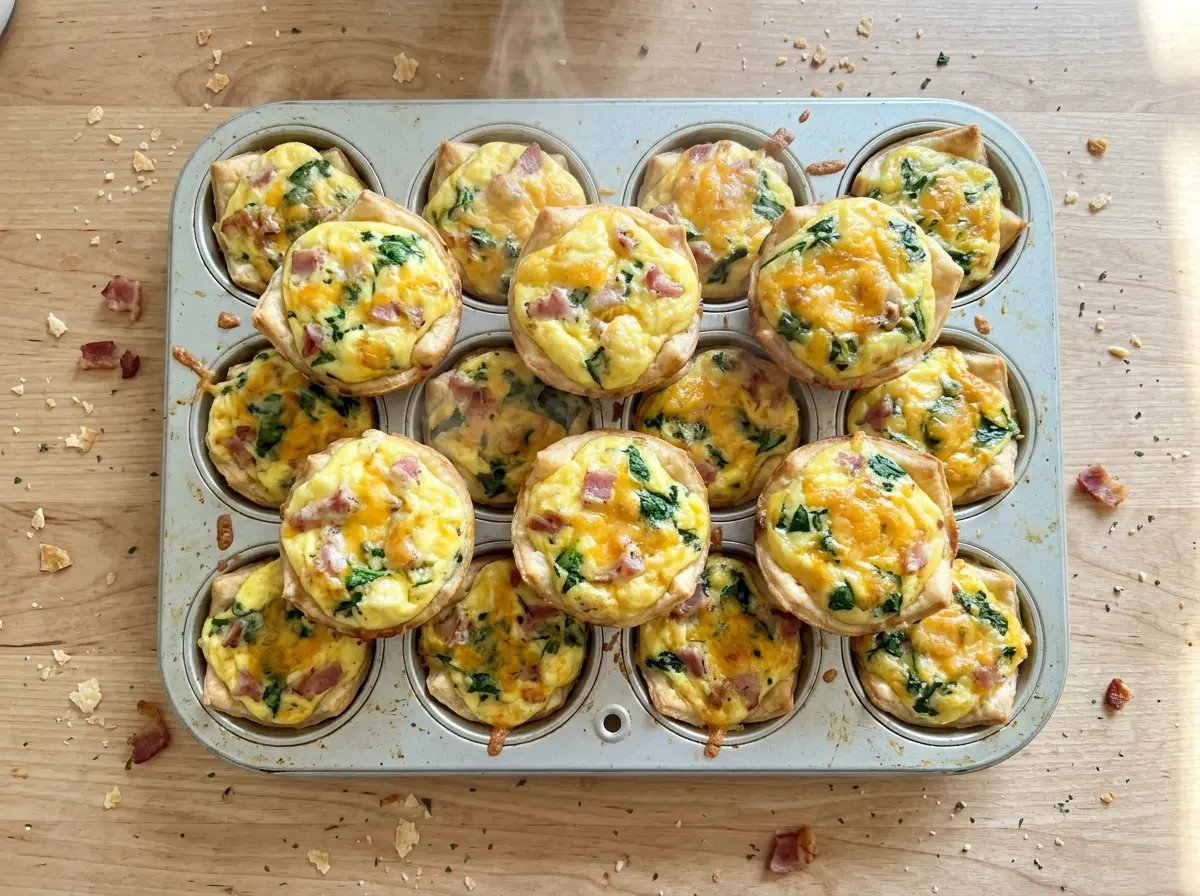
Give the quiches their full 5-minute rest in the pan before loosening them. The short pause lets the filling settle, and a thin knife can then slide around each edge without tearing the pastry.
Save these muffin tin mini quiches for brunch prep: crisp bacon, cheddar, and tender egg filling in golden pastry cups.
Why the Crust Rounds Need Pleats, Not Stretching
A muffin cup narrows toward the bottom, while a flat circle of pastry doesn’t. If you stretch the dough to force it down into the cup, the sides become thin and tight; they can pull back as the crust bakes. Cutting rounds at the right size gives you enough pastry to line the cup without tugging it.
Use a 3 1/2-inch cutter for the rounds, then press each one gently into a cup. Where the dough gathers, fold it into small pleats rather than smoothing it into a stretched sheet. The pleats make room for the curved sides and keep the pastry edge even enough to hold the egg filling.
Scraps can be rerolled once if you need more usable dough. Keep the dough in one piece as you fit it, and don’t worry if the top edge isn’t perfectly smooth; the filling is portioned below that edge. The goal is an intact pastry cup with no large gaps, not a perfectly uniform crimp.
What the Crust, Half-and-Half, and Cheddar Bring to Mini Quiche

- Refrigerated pie crusts — The packaged crusts are easy to cut into matching rounds and fit into the standard muffin cups. Keep them in their refrigerated, workable state while shaping; a crust that has become too soft is harder to handle neatly. The size and pliability are part of what makes this particular format practical.
- Bacon — Chopped bacon gives the filling crisp, salty bites and leaves drippings to cook the onion. Choose bacon you enjoy eating on its own, since its flavor carries through the small portions. Let it get crisp in the skillet rather than pulling it while still floppy.
- Yellow onion — Finely diced onion softens quickly and spreads through the little cups more evenly than large pieces. Take the time to cut it small; chunky onion can make it harder to portion the filling consistently.
- Large eggs and half-and-half — The eggs set the custard, while half-and-half gives it a richer, softer texture than eggs whisked alone. Keep the large egg size and the half-and-half together as written; changing the balance changes how the filling sets.
- Cheddar — Cheddar adds a familiar savory note that pairs well with both bacon and onion. Mild cheddar keeps the flavor gentle, while a sharper cheddar makes it more pronounced without changing the method. Shred it finely enough to divide among the cups.
From 3 1/2-Inch Rounds to Set Centers
Fit the pastry into the muffin cups
Heat the oven to 375°F and coat a standard 12-cup muffin pan with cooking spray. Cut twelve 3 1/2-inch rounds from the two pie crusts, rerolling scraps once as needed. Press a round into each cup and pleat the edges where the dough gathers. Avoid stretching the pastry thin across the bottom or sides.
Cook the bacon, then soften the onion
Set a 10-inch skillet over medium heat and cook the chopped bacon for 6–8 minutes, stirring occasionally, until crisp. Transfer it to a paper towel-lined plate and leave 1 tablespoon of drippings in the skillet. Add the finely diced onion and cook over medium heat for 3–4 minutes, stirring, until softened. Take the skillet off the heat once the onion is tender.
Whisk the custard and fill each cup
Whisk the eggs, half-and-half, kosher salt, and black pepper in a medium bowl until combined. Divide the bacon, softened onion, and cheddar among the crust-lined cups before adding the egg mixture. Pour slowly so the liquid reaches the filling without washing the pieces into one corner. Stop about 1/4 inch below each crust edge.
Bake until the centers are set
Bake at 375°F for 22–26 minutes, until the crusts are golden and the centers are set and register 160°F. The pastry color and the center temperature are both useful checks; don’t judge the egg filling by the rim alone. Let the quiches rest in the pan for 5 minutes. Loosen each edge with a thin knife and lift the quiches out.
Two Useful Ways to Change These Muffin Tin Mini Quiches
Make a bacon-free vegetarian batch
Leave out the bacon and onion, and divide the cheddar among the crust cups before adding the egg mixture. The result is a milder, cheese-forward quiche that still uses the same pastry and custard. Since there’s no bacon to cook, skip the skillet stage and go straight to whisking the eggs with the half-and-half and seasonings.
Leave out the crust for an egg-forward version
Coat the muffin cups with cooking spray and omit the pastry rounds. Divide the bacon, onion, and cheddar among the cups, then add the egg mixture as usual. Bake at 375°F until the centers are set and register 160°F; without pastry, there won’t be a golden crust to use as a visual cue.
Storage and Reheating
- Refrigerator: Store covered for 3–4 days. The pastry softens as it sits, but the egg filling keeps well.
- Freezer: Freeze cooled quiches in an airtight container for up to 2 months. Thaw them in the refrigerator for a gentler texture.
- Reheating: Warm in the microwave in short bursts until the centers reach 165°F. Long, uninterrupted heating can make the eggs rubbery and soften the crust further.
Questions That Come Up When Baking Mini Quiche
Muffin Tin Mini Quiche
Ingredients
Equipment
Method
- Heat the oven to 375°F.
- Coat a standard 12-cup muffin pan with cooking spray.
- Cut twelve 3 1/2-inch rounds from the pie crusts, rerolling scraps once as needed.
- Press the rounds into the muffin cups, pleating the edges as needed.
- Cook the bacon in a 10-inch skillet over medium heat for 6–8 minutes, stirring occasionally, until crisp.
- Transfer the bacon to a paper towel-lined plate.
- Leave 1 tablespoon drippings in the skillet.
- Add the onion to the skillet and cook over medium heat for 3–4 minutes, stirring, until softened.
- Remove the skillet from the heat.
- In a medium bowl, whisk the eggs, half-and-half, salt, and pepper until combined.
- Divide the bacon, onion, and cheddar among the crust-lined cups.
- Pour in the egg mixture, filling each cup to about 1/4 inch below the crust edge.
- Bake for 22–26 minutes, until the crusts are golden and the centers are set and register 160°F.
- Let the quiches rest in the pan for 5 minutes.
- Loosen the edges with a thin knife and lift the quiches out.


