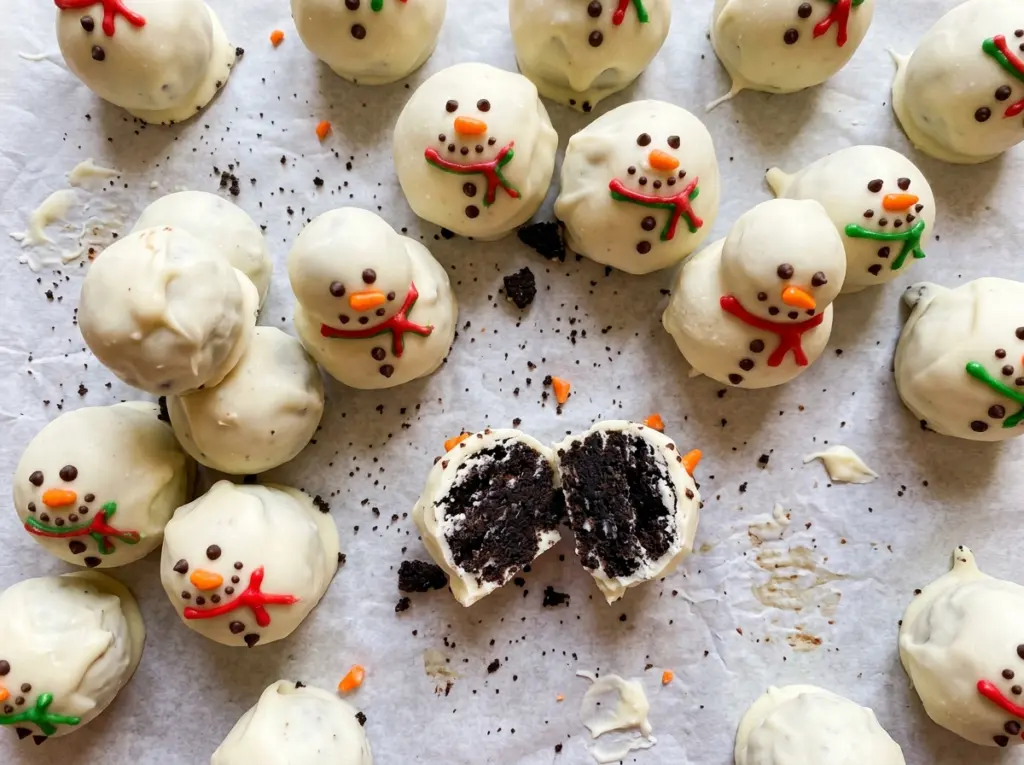
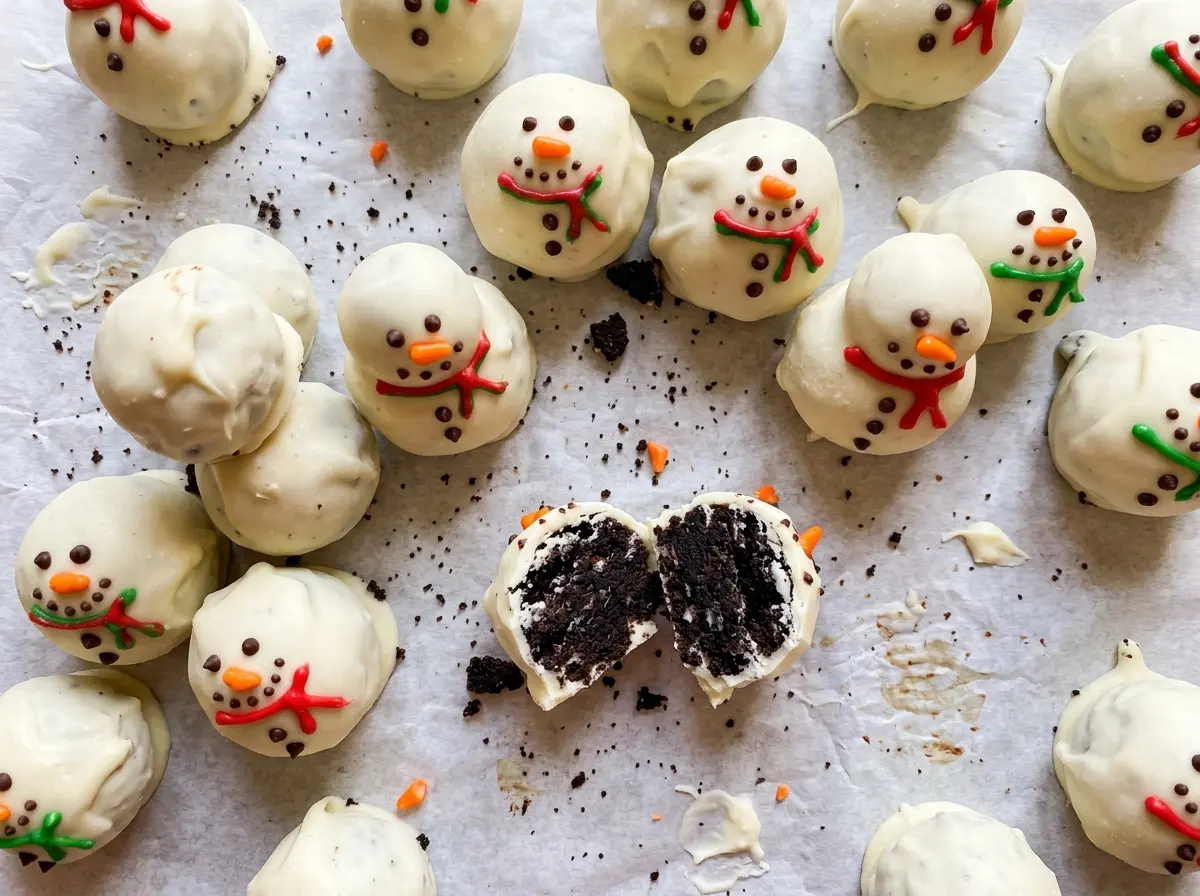
A little head can slide off a snowman if the cookie dough is too soft, and a thick coating can hide all the careful shaping. These no bake snowman truffles avoid both problems with a firm Oreo-and-cream-cheese dough and a quick chill before dipping. The result is a sweet, creamy center wrapped in a smooth white shell, with chocolate-chip eyes and buttons and a tiny orange nose.
I like that the dough comes together in the food processor, so there’s no oven to heat and no separate cookie filling to remove. The two ball sizes give each truffle its snowman shape, while melted candy holds the pieces together and seals them under the coating. Give the attached heads time to firm up in the refrigerator before dipping; that short pause makes the truffles much easier to handle. Each one comes out crisp-looking on the outside and soft and cookie-rich inside.
Kitchen Note
Keep the decorations beside the bowl before you start dipping. The candy coating begins to set quickly, so the eyes, buttons, and nose need to go on while each snowman is still wet.
Save these No Bake Snowman Truffles for a cheerful no-oven treat, with creamy Oreo centers and a crisp white candy shell.
Why the Two Ball Sizes Make These Snowmen Look Right
The snowman shape depends on a clear size difference: a larger body supports a smaller head, so the silhouette reads immediately even after the white coating rounds off the edges. If both pieces are close in size, the finished truffle looks more like a stack of two snowballs than a little snowman. Keeping the sizes consistent across the batch also helps them sit steadily on the parchment instead of tipping to one side.
There’s another small design choice worth keeping: make the chocolate-chip buttons and eyes face forward rather than crowding the sides. Three buttons give the body a simple vertical line, while two eyes and one orange nose make the face recognizable with very few decorations. The white coating is a blank canvas, so clean placement matters more than adding extra details. These are hand-shaped treats, not identical molded candies; slight variations in the curves make them look charming rather than imperfect.
The dough itself should be uniform before shaping. Any large cookie chunks can make a ball lumpy or leave a weak spot where the head joins the body, so pulse until the crumbs and cream cheese form an even mixture. That fine, cohesive texture is what lets the small pieces hold their shape through coating.
What Oreo Cookies, Cream Cheese, and Candy Melts Each Contribute

- Oreo cookies — The chocolate wafers and their filling make the truffle base, adding both cocoa flavor and sweetness. For a gluten-free version, use gluten-free chocolate sandwich cookies with creme filling and match the cookie weight; the crumb texture may vary a little by brand. There’s no need to scrape out the filling.
- Cream cheese — Softened block cream cheese binds the fine crumbs into a dough that can be rolled and stacked. A tub or whipped version isn’t a dependable swap because its texture and moisture can leave the mixture too soft to shape neatly. Let the block soften enough to pulse smoothly, but don’t melt it.
- White candy melts — Candy melts give these treats an opaque white coating that sets firm after chilling. Vanilla almond bark is the closest practical alternative; use the same weight and melt it according to its package directions, since its melting behavior can differ from candy melts. Choose a fresh package for the smoothest coating.
- Mini chocolate chips and orange jimmies — Mini chips are small enough to read as eyes and buttons without weighing down the truffles, and the orange jimmies make tidy noses. If you need a substitute for the nose, use a similarly small orange sprinkle so it sits on the face without taking over the head.
How to Shape, Join, and Coat the Snowmen Without Losing Their Heads
Turn the Cookies Into a Smooth Dough
Line a rimmed baking sheet with parchment before you start, then process the Oreo cookies until the crumbs are fine. Add the softened cream cheese and pulse, scraping the bowl as needed, until no streaks of cream cheese remain and the mixture forms a uniform dough. If the processor is packed with crumbs around the sides, scrape them back down so they mix evenly. The dough should hold together when pressed, not crumble apart.
Shape the Bodies and Heads
Roll the mixture into 18 larger balls about 1 inch across and 18 smaller balls about 3/4 inch across. Keep the two sizes in separate groups on the parchment so you can pair one of each without mixing them up. Aim for smooth, compact balls; loose cracks on the surface can show through the coating. You’ll use one large and one small ball for each snowman.
Attach the Heads and Chill the Joints
Melt the candy melts in a medium microwave-safe bowl at 50% power, stirring after each 30-second interval, until smooth; this takes about 1 1/2 to 2 minutes. Dab a little melted candy on top of each large ball, set a small ball on top, and hold it briefly so it attaches. Use about 2 tablespoons of melted candy for all the joins, rather than piling it on. Refrigerate the assembled snowmen for 15 minutes, until the heads feel firmly attached.
Dip, Decorate, and Let the Shell Set
Rewarm the remaining candy melts at 50% power in 15-second intervals, stirring after each, until fluid again. Dip each snowman, lift it with a fork, and let the excess coating drip back into the bowl before returning it to the parchment. While the coating is still wet, press in two mini chocolate chips for eyes, three for buttons, and one orange jimmy for the nose. Refrigerate for 15 minutes, until the coating is firm, and keep the finished truffles refrigerated until serving.
Simple Ways to Change the Cookies or the Shape
Make a gluten-free batch
Replace the regular Oreos with gluten-free chocolate sandwich cookies that include a creme filling, matching the cookie weight. The finished truffles keep their chocolate-cookie character, though the dough may feel slightly different depending on the cookie brand. The cream cheese and candy coating are unchanged, so check those packages if you’re avoiding other allergens too.
Use a different creme-filled cookie
Swap in another chocolate sandwich cookie with creme filling, such as a mint creme variety, using the same weight as the Oreo cookies. The filling helps bind the crumbs, while the new cookie flavor changes the center without changing the snowman assembly. If the cookies are a different size, go by weight rather than counting out the same number.
Turn them into simple round truffles
For a different format, roll the dough into equal-size balls instead of making separate bodies and heads. Dip and coat them the same way, then skip the snowman face decorations for a plain chocolate-and-cream cheese center under the white shell. This keeps the no-bake truffle base but gives you a simpler finish.
Storage and Reheating
- Refrigerator: Keep the truffles covered and refrigerated for up to 4 days. The centers stay creamy, while the candy shell may lose a little of its fresh-dipped shine.
- Freezer: Freeze the set truffles in an airtight container with parchment between layers for up to 1 month. Thaw them in the refrigerator while still covered to limit condensation on the coating.
- Reheating: Not needed; serve chilled. Don’t microwave the finished truffles, since the coating can soften and the cream cheese center will warm unevenly.
Questions That Come Up While Making Snowman Truffles
No Bake Snowman Truffles
Ingredients
Equipment
Method
- Line a rimmed baking sheet with parchment paper.
- Process the Oreo cookies in a food processor until finely crushed.
- Add the cream cheese and pulse, scraping the bowl as needed, until the mixture forms a uniform dough.
- Roll the mixture into 18 balls about 1 inch across and 18 balls about 3/4 inch across; place them separately on the prepared baking sheet.
- Microwave the white candy melts in a medium microwave-safe bowl at 50% power in 30-second intervals, stirring after each, until smooth, about 1 1/2 to 2 minutes.
- Dab a little melted candy on top of each large ball, set a small ball on top, and hold briefly to attach, using about 2 tablespoons of candy in total.
- Refrigerate for 15 minutes, until the heads are firmly attached.
- Rewarm the remaining candy melts at 50% power in 15-second intervals, stirring after each, until fluid.
- Dip each snowman in the coating, using a fork to lift it and letting excess coating drip back into the bowl.
- Immediately press 2 mini chocolate chips in as eyes, 3 as buttons, and 1 orange jimmy in as a nose before the coating sets; return it to the baking sheet.
- Refrigerate for 15 minutes, until the coating is firm.
- Keep the truffles refrigerated until serving.


